playing live

My Philosophy

Waldorf Blofeld

My musical goal, in its barest essence, is to play fully produced tracks live, just like DJ’s do, but using only hardware and without a DAW. Summing it up in one sentence doesn’t really begin to describe what this involves, however. To do this requires that every track be approached with the idea of playing it live first, and anything that can’t be reproduced live is not allowed. It also means that I had to come up with an unchanging setup that is able to handle any ideas I throw at it, which consequently means that I will not be buying any more synths or hardware until such time as transporting them becomes financially viable. And it requires an “outside-the-box” production approach, where as much as possible is handled inside the synthesizers themselves, whether it be levels, EQ, or whatever. The only other thing that is important to me is that the tracks make me want to dance, if they don’t, then they are scrapped or added to some other set that doesn’t necessarily need to be danceable. I also want to keep pushing the boundaries of what is possible in an all-live setup.

Advantages

To me playing this way has many advantages over most computer-based setups I’ve seen. One is that I don’t have to deal with software/computer obsolescence, latency, glitches/crashes, or any of the other hurdles to an inside-the-box approach to live shows. Another is that every single sound you hear can be tweaked live, which keeps the songs alive and “breathing” and offers unlimited opportunities to add or subtract in the moment. And as long as my setup stays stable, I can play any track from any era at any time. Also as I continue to expand my library of songs, there should be no issues combining tracks from any era of my music to make live sets so that 5, 10 years from now I can still perform a song that I created in the last couple of years exactly as it was when it was created, using the original instruments. And if I find ways to improve a track over time, then the tracks should continue to get better.

Disadvantages

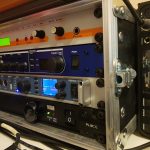
the 4U rack

Obviously the biggest disadvantage is the amount of gear needed to pull off a show. Most of those I’ve seen from other artists have a very large number of instruments and bewilderingly complex setups. The cost in time and money of transporting and setting these up for shows means that they are usually only used by larger touring acts who are getting paid enough to make it worthwhile. Another disadvantage is that for a set to sound smooth, they must all be at or around the same level, so I have to carefully watch my levels when creating and have a plan in place beforehand to do this. I don’t use a compressor or limiter at the end of the chain so this becomes extra important for set continuity.  It also requires a comprehensive backup system so that in case any piece of hardware goes down, I don’t lose all my work; I can just buy a replacement piece of gear and restore everything exactly as it was.

Here’s some detailed information on my setup.

The Setup

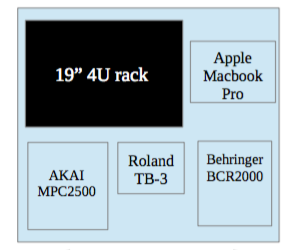
diagram of setup

To achieve this, my live setup goal was to be able to take my gear onto a bus or airplane without any help, and so I tried to choose versatile and reliable machines with a wide range of tones that weren’t overly large in size. Another factor when choosing which synthesizers I use is replaceability, that is, should some hardware break, can it be replaced with relative ease? The last factor is, the machines I choose must be able to be completely controlled with MIDI, freeing me to just perform and not have to physically switch patches or change settings. That’s what brought me to my current setup, and here are the hardware pieces I have chosen and how I use them. 

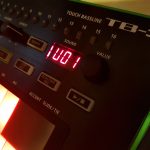
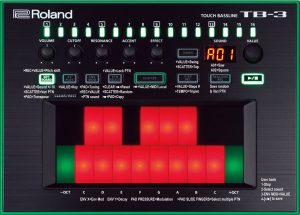
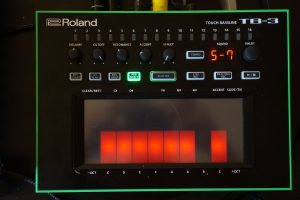
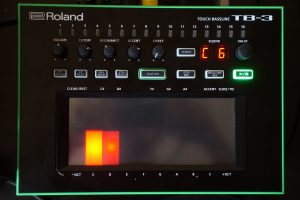
Roland TB-3

SYNTHS

  • Access Virus TI2
    • extremely versatile 16-part synth
  • Jomox Airbase99
    • 11 individual instrument outputs
  • Roland Aira TB-3
    • acid, bass, and lead machine
  • Waldorf Blofeld

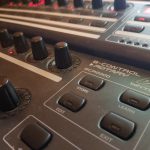
    Behringer BCR2000

SEQUENCER/SAMPLER/CONTROLLER/FX

  • Akai MPC2500
    • 300K midi messages allowing for long sets
  • Behringer BCR2000
    • to control Jomox, TB-3, FX, & software
  • Lexicon MX400
    • outboard FX unit usually dedicated to drums

OTHER HARDWARE

  • MOTU Micro Express
    • 4x in / 6x out compact midi router
  • RME Fireface UFX
    • 14 inputs (more if using ADAT)
  • Furman PL-8C E
    • rackmount power supply
  • Macbook Pro or PC running RME’s Totalmix software

…and that’s it. In fact, I’m even slowly trying to phase out the Waldorf Blofeld so that I am only using three synths, further lightening my load. Because I’ve learned how to make my own sounds, I don’t need an army of hardware dedicated to a certain task to achieve what I want.

The Challenges

If I were to ask electronic producers, I bet a lot of them would say that if they would perform their tracks, they would like to perform them live, but in practice there are many issues, like:

  • too much gear/too complicated of a setup

Having a single setup that never changes drastically increases my ability to play tracks live. I worked for years to figure out how to arrange the 14 inputs for maximum versatility. Right now I have six channels dedicated to the drum module (6), one stereo channel for the Virus which handles a lot of tasks (8), two analog inputs and one stereo digital input for the MX400 (12), and then a single mono channel for the TB-3 and the MPC (14). For the Blofeld, I route a single channel to the Virus’ right input, and I have one more output from the RME to the Virus’ left input which allows me to use the built-in Virus FX for any other channel. I do not anticipate this changing because with this setup I can achieve anything I want to achieve. The Virus is really the hub because it also has a built-in EQ and effects, in addition to the EQ, dynamics, and effects in Totalmix, and of course my dedicated effects unit which supplies two completely independent effects in parallel.

  • too much post-processing/mixing

It is my belief that there is very little that can’t be achieved outside the box, and I use a number of techniques to limit how much post-processing I have to do. For example, I have a set location on each synthesizer for the master volume to sit at, and I never move it, then I use oscillator levels or other internal volume settings to adjust the final level of a sound. Once the levels are set as close as possible, then I start using my effects, dynamics, and Totalmix to further sculpt the sound. Totalmix is the software that comes with the RME UFX and has built in EQ, dynamics for each channel, and a single reverb and echo effect that is set up in parallel. All information related to a mix can be stored in “snapshots” which saves all the information from the window and can be recalled in milliseconds simply by sending it specified midi notes.

  • too much to remember

I keep a lot of notes. I mean a LOT of notes. Since I started I have filled 10 documents of my daily notes, each of which is 40+ pages long. These journals have a number of purposes, from keeping track of things I’ve learned, to production and set notes, to planning for the above setup. It also serves to show the progress I’ve made over time. I also store individual track notes here, like BPMs, styles, synths/fx used, and anything else I can think of. I don’t go back to them that often, but when I do, it’s invaluable. The TB-3 and Airbase99 also require many pages of presets in my BCR2000 to control, so I take screenshots to remind me where I have routed everything, because it’s simply too much to remember. Perhaps once I’ve used this for a couple more years I will remember where everything is routed, but the screenshots and some logical layouts help me recall what I need to.

The result of all that work is here, my first all-original set. One Hour Techno Good luck out there!
TB-3 pattern creation & recall FAQ

Update:

  • Download the front panel guide, that information is more accurate and up-to-date than this.
  • If you came looking for the TB-3 hardware templates for BCR2000, the links are at the bottom of this post.


This post is more for me to document what I’ve been doing, and contains a lot of esoteric and germane-only-to-me information, but maybe there’s some information people out there might find useful as well, so here’s my basic setup for getting pattern creation going on the TB-3. Also at the end, I’ve linked my presets for the BCR2000 to control most of the values on the machine. For reference, brackets around a button means to hold it, otherwise it’s a press only. I like to use lock mode which has a bit of a different workflow,  so I start with that, otherwise any pattern you are working on gets overwritten by default. When you use lock mode, just make sure to press REALTIME REC when switching between modes so that you don’t lose what you’ve been working on.  Someone on the internet also made this overlay which is helpful as well.

  1. Set up lock mode [optional] :
    1. PTN SELECT → [PTN SELECT] → VALUE
  2. Semi-randomize the notes pattern:
    1. [PTN SELECT] → SCATTER
  3. Set the number of steps 1-32:
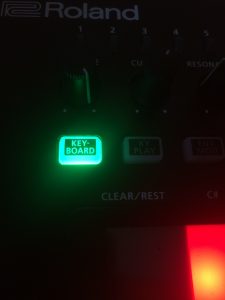
    1. KEYBOARD → [STEP RECORD]VALUE
  4. Semi-randomize the accents, glides and octaves:
    1. [KEYBOARD] → SCATTER
  5. Transpose a pattern by half steps:
    1. KEYBOARD → PAD
  6. Change swing amount (0-50):
    1. [TEMPO] → VALUE
  7. Change to triplet timing:
    1. [STEP REC] → TEMPO

This is sort of how I get the creative juices going, create a few patterns, make variations of them, and then start modifying those. If you go ahead and choose 32 steps, this gives you more random phrases to choose from.

Additional Features

If you’d like to use the TB’s internal sequencer, there are some other features available to you. Unfortunately you can’t select patterns via midi, which is one reason I don’t use the internal sequencer. Here are some cool features of the TB-3:

  • Scatter modes (using internal patterns):
    • SCATTER  → VALUE
      1. SC1: repeater
      2. SC2: repeater 2
      3. SC3: reverse
      4. …slicing, gating, random seed, glitch
      5. SC8: HPF
  • Change pattern pitch in half steps (pattern playing):
    • STEP REC / REALTIME REC on
    •  [KEYBOARD] → VALUE
    • you can also hold down the [KEYBOARD] button and then press a key on the PAD. The pattern’s base key will transpose, C to B, when the sequencer is being played back.
  • To save a sound to a user bank after editing:
    • [ENV MOD]  → VALUE, select U01-U15, then PLAY/PAUSE to verify
    • a sound can only be saved in KEYBOARD mode
  • midi modes (local off, local on, midi only):
    • [SCATTER]  → VALUE
      • if the panel isn’t responding, check this setting
  • Interrupt pattern and play glissando:
    • XY PLAY → PAD
  • Change global master tuning -7.0 → + 7.0 (pattern stopped):
    • turn off STEP REC / REALTIME REC
    • ENV MOD → [ENV MOD] → PAD
      • Unless you really need to do this for some reason, I would advise against it, as it is global. I went back and loaded some patches and everything was out of tune -2.8. 🙁
  • change the master tuning (on power-up):
    • [SCATTER] → power-on
    • [ENV MOD] → VALUE (430-450hz in 1Hz steps)
      • Another thing I would avoid messing with unless you really know what you’re doing, as it’s also global.
  • change key, C → B, chromatically:
    • [XY PLAY] → VALUE
    • This is just an easter egg that appears to do nothing, sequencer playing or not.
Problems to Iron out

Here’s where it gets kind of workshop-y and relevant only to me, but I’ve managed to solve almost all the problems I had externally controlling the machine. I recently added more time between the 11 sysex calls I use to recall parameters in case any data was being cut off, as it was in some earlier iterations of my midi parameter request sequence. Interestingly I think the CTRLR panel sends all the sysex parameters simultaneously over USB midi, so it could be possible to do it that way from your computer, but I just use the MPC2500.

  • hung notes
    1. There is a problem I’m encountering with hung notes, but it seems that a slide set but not turned off is causing them. I have been adding a 0 value slide (CC102) to the end of phrases that exhibit this issue, and so far so good, it appears to address the problem.

SOLVED: If a phrase ends without a 0 value for slide, notes can hang. Sending CC102 & CC103 with values of 0 after the offending TB part seems to address the issue. 

  • restarts necessary
    1. Sometimes for whatever reason the TB-3 doesn’t seem to respond properly to new information, with stuck notes continuing even when playing from the keyboard and there are no external sequences playing. To this point, the only fix is to restart the machine. It could be overload of sysex information or incomplete handling on the part of the TB-3. Sometimes they occur when I have them in a loop, so I always try to remember to unplug the output cable if I’m not using it. I haven’t tried any of this using USB midi, but the CTRLR plugin I use can update its values, so there should be no issues there.

SOLVED: This seems to be due to stuck notes. Following the procedure to avoid stuck notes (above) seems to fix it.

  • sound only loads properly when patch is changed or parameters are re-sent 
    1. The full sound doesn’t always seem to be loaded correctly using my parameter recall method and I seem to have better success on some than others. Some of them return nearly all the right values but one or two are missing. For example, I recalled one patch and after some investigation I found that the main problem was that the delay was set to stereo and I have moved the module to a mono input, so either it wasn’t saving properly or it was just not playing properly because it was formerly in stereo.  Note to self here: Every parameter on the synthesizer is mono EXCEPT the stereo delay 1 & 2, if set to stereo mode.

SOLVED: I found that I was missing a section of the parameters that was supposed to be being sent. Everything started to work once I restore that section. In the full set, CK seemed to still have problems loading properly even after the sysex parameters were verified, but it turns out the problem was again stuck notes. Once the stuck notes problem and missing sysex section problems were solved, this problem disappeared. 

  • sequence not always accurate when played back from external sequencer
      1. It seems that most of the time sequences play back properly from an external sequencer, but occasionally there are differences which I can’t really figure out. As far as my hardware sequencer is concerned, it seems to record the same loop different ways. For example, accents and slides may be a tick or two after the note, but it’s not consistent so it’s hard to fix if it doesn’t seem to record correctly. Even copying/pasting working phrases to non-working areas doesn’t seem to fix it. I have read that transcribing patterns for external sequencing from this machine and machines like it presents problems, and different people use different methods to address them. The TB-3 uses the long sustain method I think.

SEMI-SOLVED: The only way to avoid this issue is to test to see if it plays back properly when recorded. If the problem seems to be slide-related, try turning off slide on the last step and re-recording. If that doesn’t work, the only solution is to play the patterns directly on the machine. However, most patterns seem to be largely played back as desired, only towards the outer range of possibilities do problems appear.


Epic Post Epilogue

I have reached a pretty good stage of the live setup which I hope will be stable for a while. The process of saving patterns and sounds to midi has taken some trial and error, but there have been no “deal-breakers” to this point. Accessing all the sound parameters live is also possible with an external device like a BCR2000, and to be honest if I couldn’t adjust and save these values I would probably not be able to use it in a serious setup, but as it is, this synth is a diamond in the rough. Sometimes patches are at different levels but I found I don’t have to adjust the main volume, I can either raise or lower the individual levels on the TB-3 (preferable though more complicated) or adjust the preamp level (easier). The level is quite hot so I keep it at about 3 o’clock so that I have a little headroom to get loud if I want. And if you just want that “classic” acid sound, pick preset A01 or A02 and tweak away, as it is actually one of the closest emulations out there based on videos I’ve seen. This has been a really fun machine to sound design on and now I use it in almost every track! And as promised, here are some links to my TB-3 BCR2000 presets in BCR format:

  1. TB3-SOUND
  2. TB3-FX Library 1-1
  3. TB3-FX Library 2-1
  4. TB3-FX Levels & Distortion
  5. TB3-FX RV,PS,EQ

Roland Boutique JX-03 chaining notes

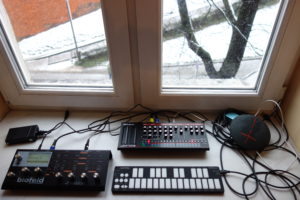
  • This is what the setup looks like with an added JX-03.

    MIDI clock sends all the time, I don’t think it can be turned off. If set to auto, it will check for external clock first and sync to that, otherwise it uses internal tempo, set with [MANUAL][3] and then [1] or [2]. That means any synth that receives output from the JX will need to sync to it or set up local control so that incoming midi doesn’t affect it.

  • Along with MIDI clock, the sequence always send its midi notes to the MIDI output. It will be important to never start a sequence from the JX because it will probably send unwanted notes onwards.
  • Chain mode was set to on at first, and this caused problems because it would not send note offs from the MIDI output, which caused hanging notes.
  • The JX also sends program change messages, which cannot be turned off. This should be noted for any downstream synths in the chain.
  • Some USB ports do not supply enough power to keep the JX on. My phone charge battery for example did not work.
  • Not sure about stereo, if the JX receives and/or sends it on with its input/output jacks. The output on the JX is monoaural, except for the chorus output, which is stereo.

TB-3 Extended Features & Parameter Recall

A Nice Surprise: The TB-3’s Hidden Features

As it turns out, the Roland Aira TB-3 is much more than meets the eye. When it first came out, it was a simple TB-303 emulator with 4 knobs, a touchpad with x/y/pressure control, and a built-in step sequencer. Then in 2014, Roland released an extended sysex document and firmware update (1.10) that allowed you to access more features, including control over a limited VCO section, distortion, and the two effect slots, as well as a 16-slot user patch storage section. If this weren’t enough, it was recently discovered that using an undocumented sysex control method it was possible to access 11 separate sections plus the sequencer, all controlled with midi. These are not novel uses of the effects, these are completely new sections:

  1. VCO independently control sine, square, saw, ring + pink/white noise
  2. VCF with ADSR envelope, amount, accent & keyfollow
  3. VCA with ADSR
  4. LFO modulates VCO, VCF, VCA with 5 shapes including S&H
  5. Cross Modulation 8 types combining square, saw, and noise sources
  6. Ring Modulation 4 mod shapes, separate from FX 1&2
  7. CV Offset inputs to SAW, SQR, RING, LFO
  8. Distortion 25 types with Drive, Bottom, Tone & wet/dry mix
  9. Effect 1 8  types + Pitch Shifter & EQ
  10. Effect 2 8 types + Reverb
  11. Parameter Assign
    1. allows assigning of any parameter to X or Y pad, press modulation, or effect knob with 0-255 value range
    2. all known parameters can be assigned (±256)
    3. all four controllers can be assigned simultaneously

WOW! It’s like getting a whole new synth! The only envelope control available before was VCF decay, but now all four stages of VCF/VCA are available and with the new additions you have total control over your sound, whether it’s long drones or staccato stabs, maybe even PWM. The crossmod feature is extensive, for example allowing the oscillators to play at different pitches, and ringmod is especially juicy. Parameter assign lets you control any of the 256 parameters with four selectable mod destinations, like the touchpad or effect knob. In addition, there is complete MIDI control over pattern parameters and portamento types/amounts. With pattern control, you could even write your own software to generate random or semi-random values for the pattern sequencer, although I have not tried editing patterns yet. Finally, you can set and receive the machine’s midi channel and modes remotely.

Still In Search of Parameter Recall

What I had set out to do at the beginning still wasn’t possible though, which was to back up sounds/patches, not to be confused with pattern backup, which was already possible. The sysex document provided with the 1.10  firmware update indicated that the patch, distortion, and fx1/2 sections were available for edit, a great improvement over the front panel alone. I had succeeded in getting a response from the synth as to the current values, but of course there were often many more unavailable parameters that were altering the sound that couldn’t be retrieved.

Then I started looking for editors on the internet to see if anyone else had taken snapshots or otherwise used the synth’s data to populate a visual interface. (Most people would have tried this first, but not me!!) I found one and viewed the sysex data in use and I immediately noticed it used a different, undocumented format and this led me to the TB-3 unofficial MIDI spec which maps out all the known parameters. I emailed him to ask about these undocumented sysex calls and when he answered he detailed what each of the commands returned. For those that are interested, here are the RQ1 commands:

  1. VCO                   F0 41 10 00 00 7B 11 10 00 08 00 00 00 00 0E 5A F7
  2. VCF                    F0 41 10 00 00 7B 11 10 00 0A 00 00 00 00 0B 5B F7
  3. VCA                    F0 41 10 00 00 7B 11 10 00 0C 00 00 00 00 05 5F F7
  4. LFO                     F0 41 10 00 00 7B 11 10 00 00 00 00 00 00 0D 63 F7
  5. Cross Mod      F0 41 10 00 00 7B 11 10 00 04 00 00 00 00 0A 62 F7
  6. Ring Mod         F0 41 10 00 00 7B 11 10 00 06 00 00 00 00 0E 5C F7
  7. CV Offset         F0 41 10 00 00 7B 11 10 00 02 00 00 00 00 06 68 F7
  8. Distortion        F0 41 10 00 00 7B 11 10 00 0E 00 00 00 00 09 59 F7
  9. Effect 1               F0 41 10 00 00 7B 11 10 00 10 00 00 00 00 5F 01 F7
  10. Effect 2              F0 41 10 00 00 7B 11 10 00 12 00 00 00 00 54 0A F7
  11. Param Assign F0 41 10 00 00 7B 11 10 00 14 00 00 00 00 12 4A F7

If you send the TB-3 these 11 commands, the machine will spit out all the information it contains in sysex format, and the data the TB3 returns can be recorded. When played back they will load into any location’s edit buffer, user or preset, but will not overwrite any sounds. Program change isn’t even necessary because you are just overwriting the location’s edit buffer. Create a named folder for each new patch and now  you have all the information you need to recall a patch’s full parameters. Even though I didn’t technically find patch storage, I found the next best thing — complete parameter recall!

Paradise Gained

Now you sound designers out there don’t have to settle for a stock preset or worry about overwriting one of your precious 16 user slots. With all these parameters you can seriously mangle a sound, and once you get your main patch designed, use the extensive Equalizer from FX 1 and reverb or delay from FX 2 to add the finishing touches for your mix. Other ideas include using 3 separate ring modulations, dual delays, crossmod into pitch shift/phaser, the possibilities are practically endless, but whatever you come up with, you can save them all to recall for a later session. No longer is the TB-3 just a desktop toy playing preset sounds, it can be a powerful workhorse in your studio. This is now a top-notch machine that I can’t wait to explore and design on.


Download the Request file here:

TB-3 REQUEST PROGRAM

Roland TB-3 effects

The TB-3 has many effects and each of those effects has many parameters. There are two separate FX slots and a distortion slot that can all be used simultaneously. The documentation is in very small print though and not easily navigable, so I have put the information into a PDF for easier reference which you can access by clicking on the link below.

Roland-Aira-TB3-FX

my Roland TB-3 FAQ

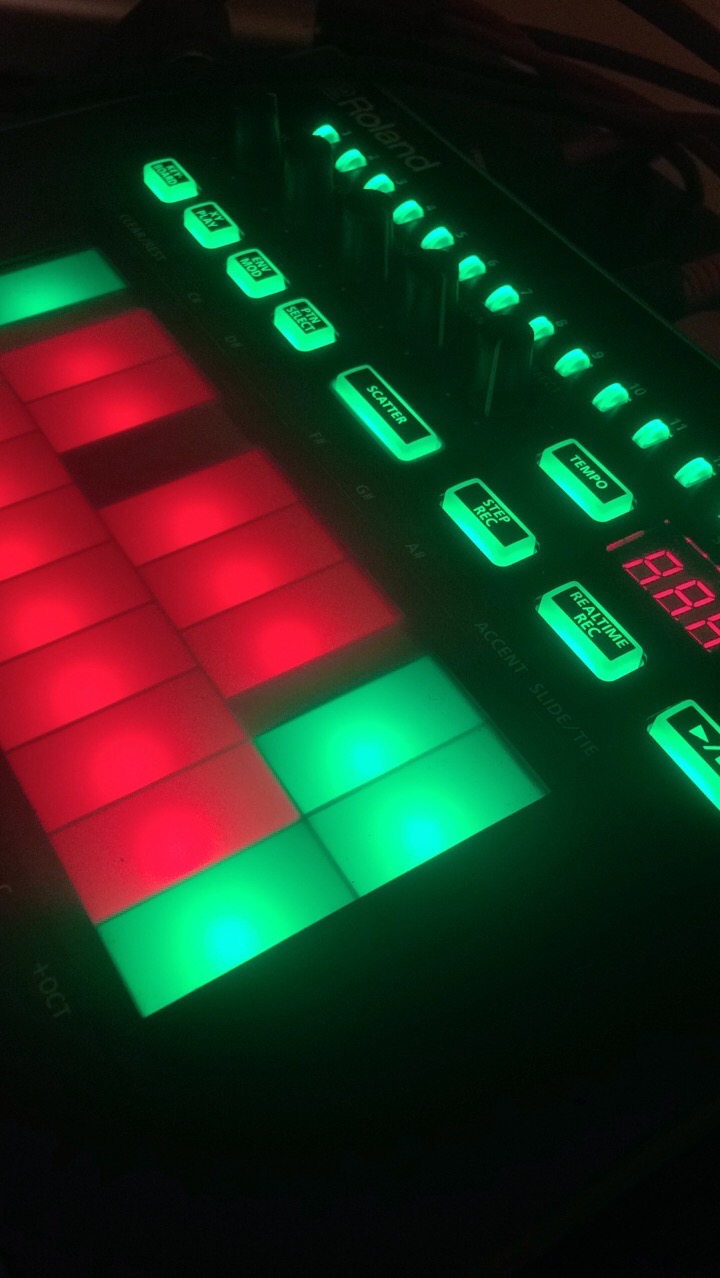
I finally went and bought a Roland Aira TB-3, for a number of reasons. First, I’ve been wanting a dedicated acid machine for quite a while since I sold my FutureRetro 777, but I wanted one updated for modern production. Another thing I absolutely had to have: patch memory. Almost none of the currently available machines have that capability, including the TB-03 and TT-303. There are some vintage machines available with patch memory but I really didn’t want to go that route. I’d heard the sound of the TB-3 and I liked it, so the choice was easy: Roland Touch Bassline TB-3.

Sounds, Patterns, & Notes

It’s not always clear with Roland’s documentation what things mean, and  integrating it into my system proved more difficult than I had expected. In the context of the TB-3, there are two main components: sounds and patterns. A “sound” is a “patch” or sound program and refers to the synth parameters, while a “pattern” is a series of notes, gates, slides & accents that form a sequence. Patterns can be saved into 8 banks of 8, and can be saved to a computer. Sounds can be saved to one of the new 16 user slots and stored on your computer so that you can create a library of as many extra variations as you want. Roland provides no documented way to save patches on your computer, but I did manage to find an undocumented way. Here are some more discoveries I made that might help you.

  1. To save a sound, stop the sequencer (in keyboard mode), [hold] ENV MOD and turn the value wheel until you pick a desired user slot, then press the PLAY/PAUSE button to save it. Only 16 slots, but plenty for a live show.
    1. The user patch section is only accessible by the front panel and cannot be accessed without some human intervention. Once you navigate to the user section, it is possible to send program change to change user slots. If you send program change while in a user slot, it automatically switches to A01. The presets are accessible with program change and bank change.
  2. All patterns are saved automatically unless “Lock” is turned on. To set up Lock mode, turn off any record, [hold] PTN SELECT and then turn the value knob. Preset pattern variations 1-1 thru 8-8 cannot be selected via midi either, front panel only.
  3. To change the number of steps (1-32), [hold] STEP REC and turn the value knob.
  4. To change to triplet timing, [hold] STEP REC and toggle the TEMPO button.
  5. To transpose the track up or down, turn on REALTIME or STEP REC and then while holding the KEYBOARD button, turn the value knob.
  6. It’s also possible to associate a particular sound with a particular pattern in the user section.

Bypassing the Internal Sequencer

In a live context, i don’t really like to use a machine’s internal sequencer or arpeggiator because they almost inevitably start out of time or fail to sync when they’re triggered. In the TB-3’s case, the sequencer ALWAYS runs and I would have to select patterns manually live, which is not something I wanted to have to remember to do at every live show. So what I do is just record the arp or sequence’s midi information to a sequencer, turn off the TB-3’s internal sequencer, switch to an empty pattern, and then play the information from my main sequencer. Here’s how I did it:

  1. Before you start,  make sure midi is set to AUTO and not INTERNAL or it won’t respond to external midi clock. I also turned off the midi thru functionality so only the internal stuff is sent through the TB-3’s output. These are both set by restarting while holding down the SCATTER button. Here’s what mine looks like (midi is set to channel 6). Press PLAY/PAUSE to save, exit, and reboot.
  2. First, clear out a pattern ([hold] PTN SELECT and press the CLEAR pad). I chose pattern 1-1.
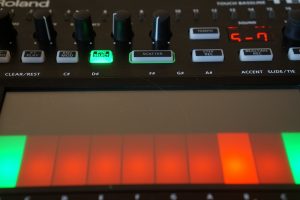
  3. Now choose the pattern you’d like to record into your sequencer. I chose two: 1-6, a straightforward one,  and 5-7, a really slide-y one.
  4. Now get your sequencer ready to record. Make sure there are no feedback loops since you will have midi cables both in and out of the TB-3 (this is where turning off midi thru functionality comes in handy). Press play/record on your sequencer, which should trigger the pattern, and record it into your DAW or sequencer. Stop at the end of the phrase.
  5. Now unplug the midi out cable from the TB-3 to prevent feedback loops, change to the empty pattern and play back what you recorded into your DAW or sequencer. If this works, then you’ve bypassed the TB-3’s sequencer.

Now you can use the TB-3’s internal sequencer to make a sequence, play it into your DAW, and bypass the TB-3 internal sequencer with no loss of information. Additionally, there is no need to overwrite patterns you want to keep using this method.

Time to Have Fun

Now that we can control the machine externally, go to any pattern, and press PTN SELECT [hold] then press SCATTER to randomize the note pattern and KEYBOARD [hold] then SCATTER to randomize the accents, glides, and octaves. If you press REALTIME REC button in between switching from PTN SELECT to KEYBOARD mode, it won’t erase and start over. Save the pattern by pressing REALTIME REC or simply play the sequence into your sequencer and play it back from there.  No need to back up patterns this way! And you can store patches as well, check out this page for more information.

Check out this document for the rest of the cheat codes. http://airainfo.org/files/tb-3_cheatsheet.pdf

How I Use the KMI QuNexus

The Keith McMillen QuNexus is a very flexible controller with great software. Even though its main function is a computer USB controller, at which it excels, it also is equally capable in MIDI 5-pin (with the expander) or CV control modes. It will even function as a MIDI-to-CV & CV-to-MIDI converter.

Channel 1 uses keyboard layer

What I’m doing now is using the QuNexus to trigger arpeggiators on separate patches in multimode on  my Waldorf Blofeld. Because of the software included, you can route any controller and any channel to any key or range of keys. In addition you can set the keys to “latch” mode so that you can trigger patches and have them stay running until you press the key again. Generally I route the bottom three or four keys to separate channels, in latch mode, and then assign my sound programs (each of which has an arpeggiator) to those keys, allowing me to trigger them like I would on a sequencer. Then, I route about an octave in the middle of the keyboard for the bassline, which I hold and change while performing. I usually leave around five keys above and below this middle section for other parts, so that I can have multiple melody or rhythm lines running, making sure that their transpose range is assigned properly so it matches the key of the main bassline. If I don’t need a full octave for a bassline, I’ll sometimes assign it to the five keys below the main section, or if I need a number of different arpeggiators or samples, I will assign each of those five keys to separate patches.

all other channels use controller layer. this one is set to latch with a controller assigned to tilt

In one of my more complex tracks, I assign the bottom three keys to a kick, snare, and hihat. With the next four keys, I assign each to a different one-shot sample which I trigger by hand when I want a drum break or want to trigger the vocal sample (to use samples you need the full keyboard version of the Blofeld or LicenseSL). The next section of keys I’ve assigned to a sort of “wub” bass, and the top section is an arpeggiated melody track that lays over the top. For the “wub” bass, I’ve set a modulation slot to vary the speed of the wub sound and then set up the tilt controller so that I can alter it live, and the upper melody section is set up similarly, except tilt acts to raise/lower the pitch of one of the oscillators. It has nine separate programs assigned to this multi, which gives me plenty of variety when trying to make dynamic, live performances.

Of course, the QuNexus is not a sequencer, so it takes practice to trigger the arps exactly on time, and there is even sometimes a bit of a lag in the arp “catching,” but with practice it is doable, and it’s even possible to trigger an arp at a different point in the measure than on the first beat of the measure so that you can creatively alter the rhythm as well, depending on exactly when the arp is triggered in the phrase. In addition, any samples that are set up stop playing as soon as the key is released, so it is easy to say trigger the first part of a sample but not the last part until you hold the key a bit longer.

Head, Hands, and Heart: H³

This is a proposal I wrote for submitting to Unsound Krakow. See more about what inspired this here.

They say that the sooner a smoker has their first cigarette of the day, the more addicted they are, while those who wait until later have a greater handle on their vice. So what does it say about our addictions that so many check their devices before even getting out of bed in the morning? How many smokers keep a pack in the bed with them so that they can grab a few puffs if they wake up in the middle of the night? Do they hold onto their cigarettes throughout the day, carefully cradling them in nearly every conceivable circumstance? This artist believes that our increasing reliance on devices feeds on quietude and rest, something that is increasing every day because of technological advancements and the resulting decline in the need for human labor. Many even consider driving to be an activity that is restful enough to attempt to interact with devices, so the bar to fully engage an audience is set pretty high, and the tendrils extending into the mind’s addiction centers run as deep as anything we’ve ever known.

So how do we combat something that may be more habit-forming than even our most addictive substances? One remedy is activity for which we need to be fully engaged, and the only ones that seemingly meet that standard are primal ones like when we play, eat, make love, or converse with one another. Those moments are “now” moments…ones that require our full attention. That’s one reason why this artist, a Chicago transplant now firmly planted in Krakow, has committed to 100% live electronic music so that every performance is a “now” moment both for the musician and audience, while at the same time shortening the distance between the technology and the art. He’s even taken it further by playing in Krakow’s open areas using only a single synthesizer and controller, which requires him to hand-trigger every sound that is produced, and gives ample opportunity for improvisation, another “now” activity. The artist also participates and contributes to those moments around him by programming facsimiles of the surrounding sounds – like police sirens, church bells, and birdsong – and when their calls appear in his environment, he has a ready response.

When performing like this, one needs to have three things fully engaged: head, hands, and heart, with a goal of inspiring the engagement of those same things in the audience. Head to keep track of everything, hands to translate ideas to action, and heart to forge an emotional connection with the audience. That’s why the artist has responded to the theme “Presence” with a musical project in three parts entitled “Head, Hands, and Heart: H³,” where each part is dedicated to one of the trio. H³ also refers to the name of the most abundant ion in the universe, which exists almost exclusively in the ultra-cool, ultra-slow expanse of interstellar space, and the stillness in which H³ exists is an analogue to the state of being that the music will request from its listeners. It’s not as if people are remarkably different from before we had all this information and entertainment at our fingertips – people still look for the same things, a real connection, a real emotion, things that inspire, and to connect with the now. This artist relishes the opportunity to continue his long-time exploration of genres like ambient and drone, to satisfy those other seekers who search for “presence” through the pure energy of music.

emulating mWave I patches on Blofeld

I wanted to see how close I could get my Blofeld to sound like some patches on my MicroWave, so first I made some notes for the settings of the original patch for reference. To understand what values I’m translating from and to follow along at home, you’ll need to reference the table of parameters at the end of the entry.

In general, things seemed to work out one-to-one, for example a 10 filter cutoff on MW roughly equals a 10 on Blofeld as they both go from 0-127. First set both octaves to -16, the equivalent of -1 on mW. Set osc 2 wavetable to #46 PWM Pulse and osc 1 to pulse. As for osc volume, the mWave has 0-7 for wave volume, so a 2 would equal about 36 (around 18 per step) on BF’s 0-127 scale and that translates to about 38-45 on osc 1 and 127 on osc 2, both routed to the same 24dB LPF. To translate the “startwave” and “startsample” wavetable parameters to the Blo, according to the manual

When a wavetable is selected, the parameters Pulsewidth and PWM serve to select the start point of the waves.

so that’s where I’ll be headed in osc 2 to start getting them close. I have the two synths set up and are playing them side by side to get a feel for how close I’m getting, and I have a feeling these are the key settings to get correct.

As it turns out you have to fiddle with the PW and PW Amount a lot to get it close to the sorta overtone but a 30 startwave was about a 30 PW and wasn’t quite sure where 87 startsample was, but a couple of locations in PW Amount near to the extremes seem to get closest, although it’s still not quite right, missing some brash overtones in the mid to upper register even with brightness turned all the way up. The MW also uses stepped (non-interpolated) settings for its wavetable and since the Blofeld is not stepped it would probably take a fair amount of modulations to get that part closer. I think the MW is being overdriven in the wave stage so that’s perfect for dialing in drive on the filter, tube or clipping at 19 or so. Here are my attempts, the first one is MW, and the second is Blofeld. Good headphones or speakers will be necessary to pick up the nuances when the filter is opened a little wider with velocity.

the original MW1 patch

the Blofeld recreation

Even though the tone is sorta there, to me the Blofeld sounds “rounder” on the attack, and the velocity doesn’t seem to open the filter as much. To address those, I changed the filter type to PPG LP,  added a little more filter env, modded the amp decay by ampEnv to give a more linear shape to the stage, and added a little pitch mod from filtEnv and got this. Sorry I played it a half step up haha 🙂

same Blofeld sound with linear envelopes/PPG filter

It’s still missing some mid/upper harmonics and the tone isn’t quite right but I think it’s closer than in the previous one in the lows and low-mids. I don’t really think the Blofeld is capable of fully emulating the natural tone of the microWave, there’s just something in the fullness of the basic tone that seems rounder on the Blo, that doesn’t “cut” as well as the MW, but in the context of a track, the patches will perform the same purpose. Below is a chart of the main values of the patch I was trying to emulate. Tell me what you think in the comments!

mWave patch: JCJ LOW BASS

Wave1Wave2Osc1Osc2AmpEnvFiltEnvLFO1VolFilt
ShapesquarePWM Pulse R66Octave-1-1Delayn/a0ShapesinEnv Amt63Cutoff10
Startwave6230Semitone00Attack10Rate1Env Velo63Env Amt11
Startsample5287Detune-13Decay1428Symmetry0Keytrack0Env Vel52
Env Amount210Bend Range00Sustain182HumanizeoffMod 10Keytrack0
Velocity00Pitch ModenormalnormalRelease2813Level Mod SrcKeytrack Mod 20Mod 10
Keytrack00Delay1Mod 20
Mod 1linkMod 1Src: LFO1
Ctrl: Modwheel
Amt: 63
linkAttack50Resonance0
Mod 2Src: Filt Envelope
Amt: -2
linkMod 2Src: LFO1
Amt: 17
Quantize: 0
linkDecay0Res Mod0
Volume27

more Blofeld arpeggiator tips

Let’s see if I can re-create this drum pattern, TNGHT’s “Higher Ground,”  using the Blofeld’s onboard arpeggiators. It’s not going to be easy, but I’m sure it’s possible, and probably in more than one way. First thing I did was listen to the original track in super slo-mo and mapped out the basic pattern of kick, snare, & clap and put them into a 16th note grid. There is also a hi-hat, a few different snare patterns and rolls, a vocal sample and a lead that I’ll need to add, but I’ll start with the basic stuff.

The kick pattern above sounds like a big 808 kick drum with a long decay and  is on a 16th note pattern, but in the last measure, there is a high version of the kick that lands between the beats. It sounds like a triplet to me, so somehow I’ll need to make a kick pattern that has both a regular beat and then a triplet beat at the end. I had already made some of the other parts, the snares, the claps, and one of the snare rolls, along with the sample, but I still couldn’t get that last kick measure right, pitched up an octave and syncopated against the beat, presumably with a triplet pattern.

My first effort was to just make a triplet beat to see if it sounded right. So to make sure I set up a 4/4 kick and then laid a 1/8T beat, no user pattern, with a hihat sound over it. Yes, that worked. Then to try and make the beats land properly according to the grid, I made the 1/8T beat a 12 step user pattern like in the photo and it seemed to work well, coming around when it should against the 4/4 beat, so, I thought, just change the sound for this arp pattern to a kick, and try to lay a straight beat over it for the other sounds. Well, that didn’t work because the kick would come around too soon, essentially it’s in 3/4 and everything else is in 4/4 so I couldn’t get everything in the proper time.

Then I hit on it…I could just trigger the last two notes as a separate arp at the end of the measure. So I set up a copy of the original kick pattern with arp set to 1/8T…and it didn’t quite sound right. Then I changed to 1/8., or a dotted eight note and it sounded I thought exactly correct. Turns out it probably wasn’t a eight note triplet, it was a dotted eighth note. I left the last measure of the original kick pattern blank and trigger this 1/8. pattern for one measure at the end. It may be possible to latch the high triplet kick pattern so that it syncs with the other main kick pattern, but the closest I got was setting clock to 1/4T, note length 1/16, pattern length 12, with notes triggered on step 11 & 12, but that’s not quiiite right, although it’s close. Gotta keep working on it!