An Adventure of a Lifetime in West Africa

Taking the Show on the Road

Kumasi, Ghana

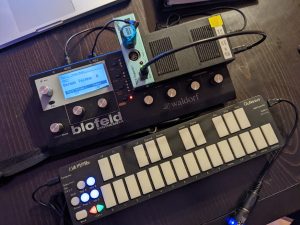
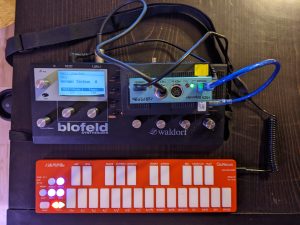
The West Africa tour was a great success. Seven countries, 7000km, and many unforgettable experiences. On this trip, I took the new white Blofeld with me, but unfortunately, I had to go back to the tried-and-true wired connection because the midi dongle on the KMI QuNexus broke and I couldn’t order new ones in time.  This time, I also had my Tascam DR-10L to record so that even if the video audio wasn’t good, I still had a good recording of the performance that I could go back and sync later. There were many issues that had to be dealt with during the tour, but ultimately there were no showstoppers and everything went off very well. There were no major injuries, the bike worked more or less the entire time without an issue, and nobody got any sicker than what could be expected when you travel to different places and eat local food. At some point I’ll document it like I did the 2018-2019 South America tour but that is a pretty long process. I am putting up videos on my youtube channel and titkok so go to doperobot.com and click on the links there.


Travel Notes

the case i used

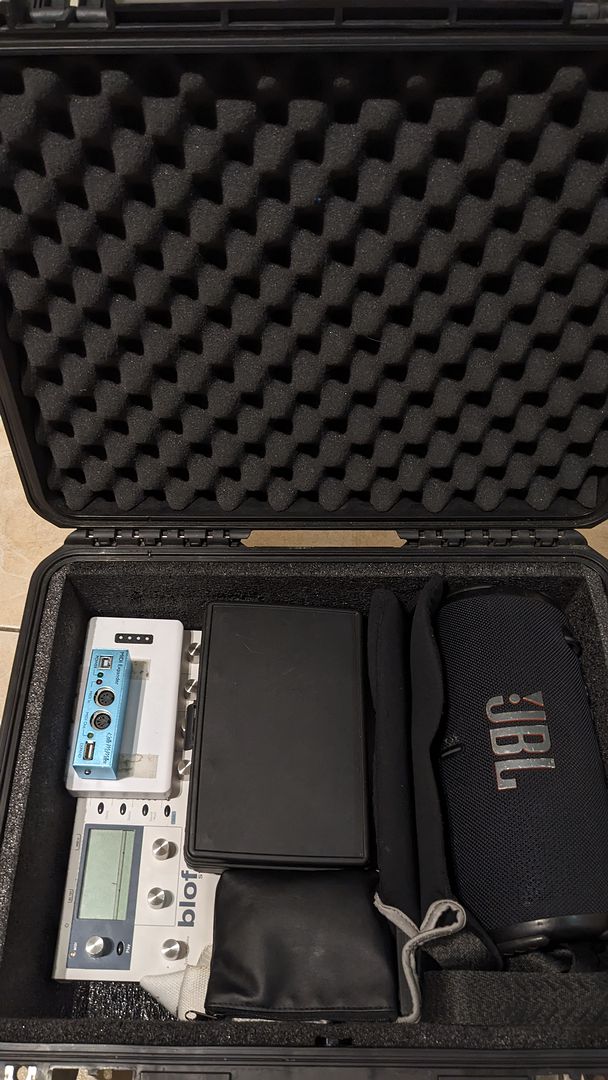
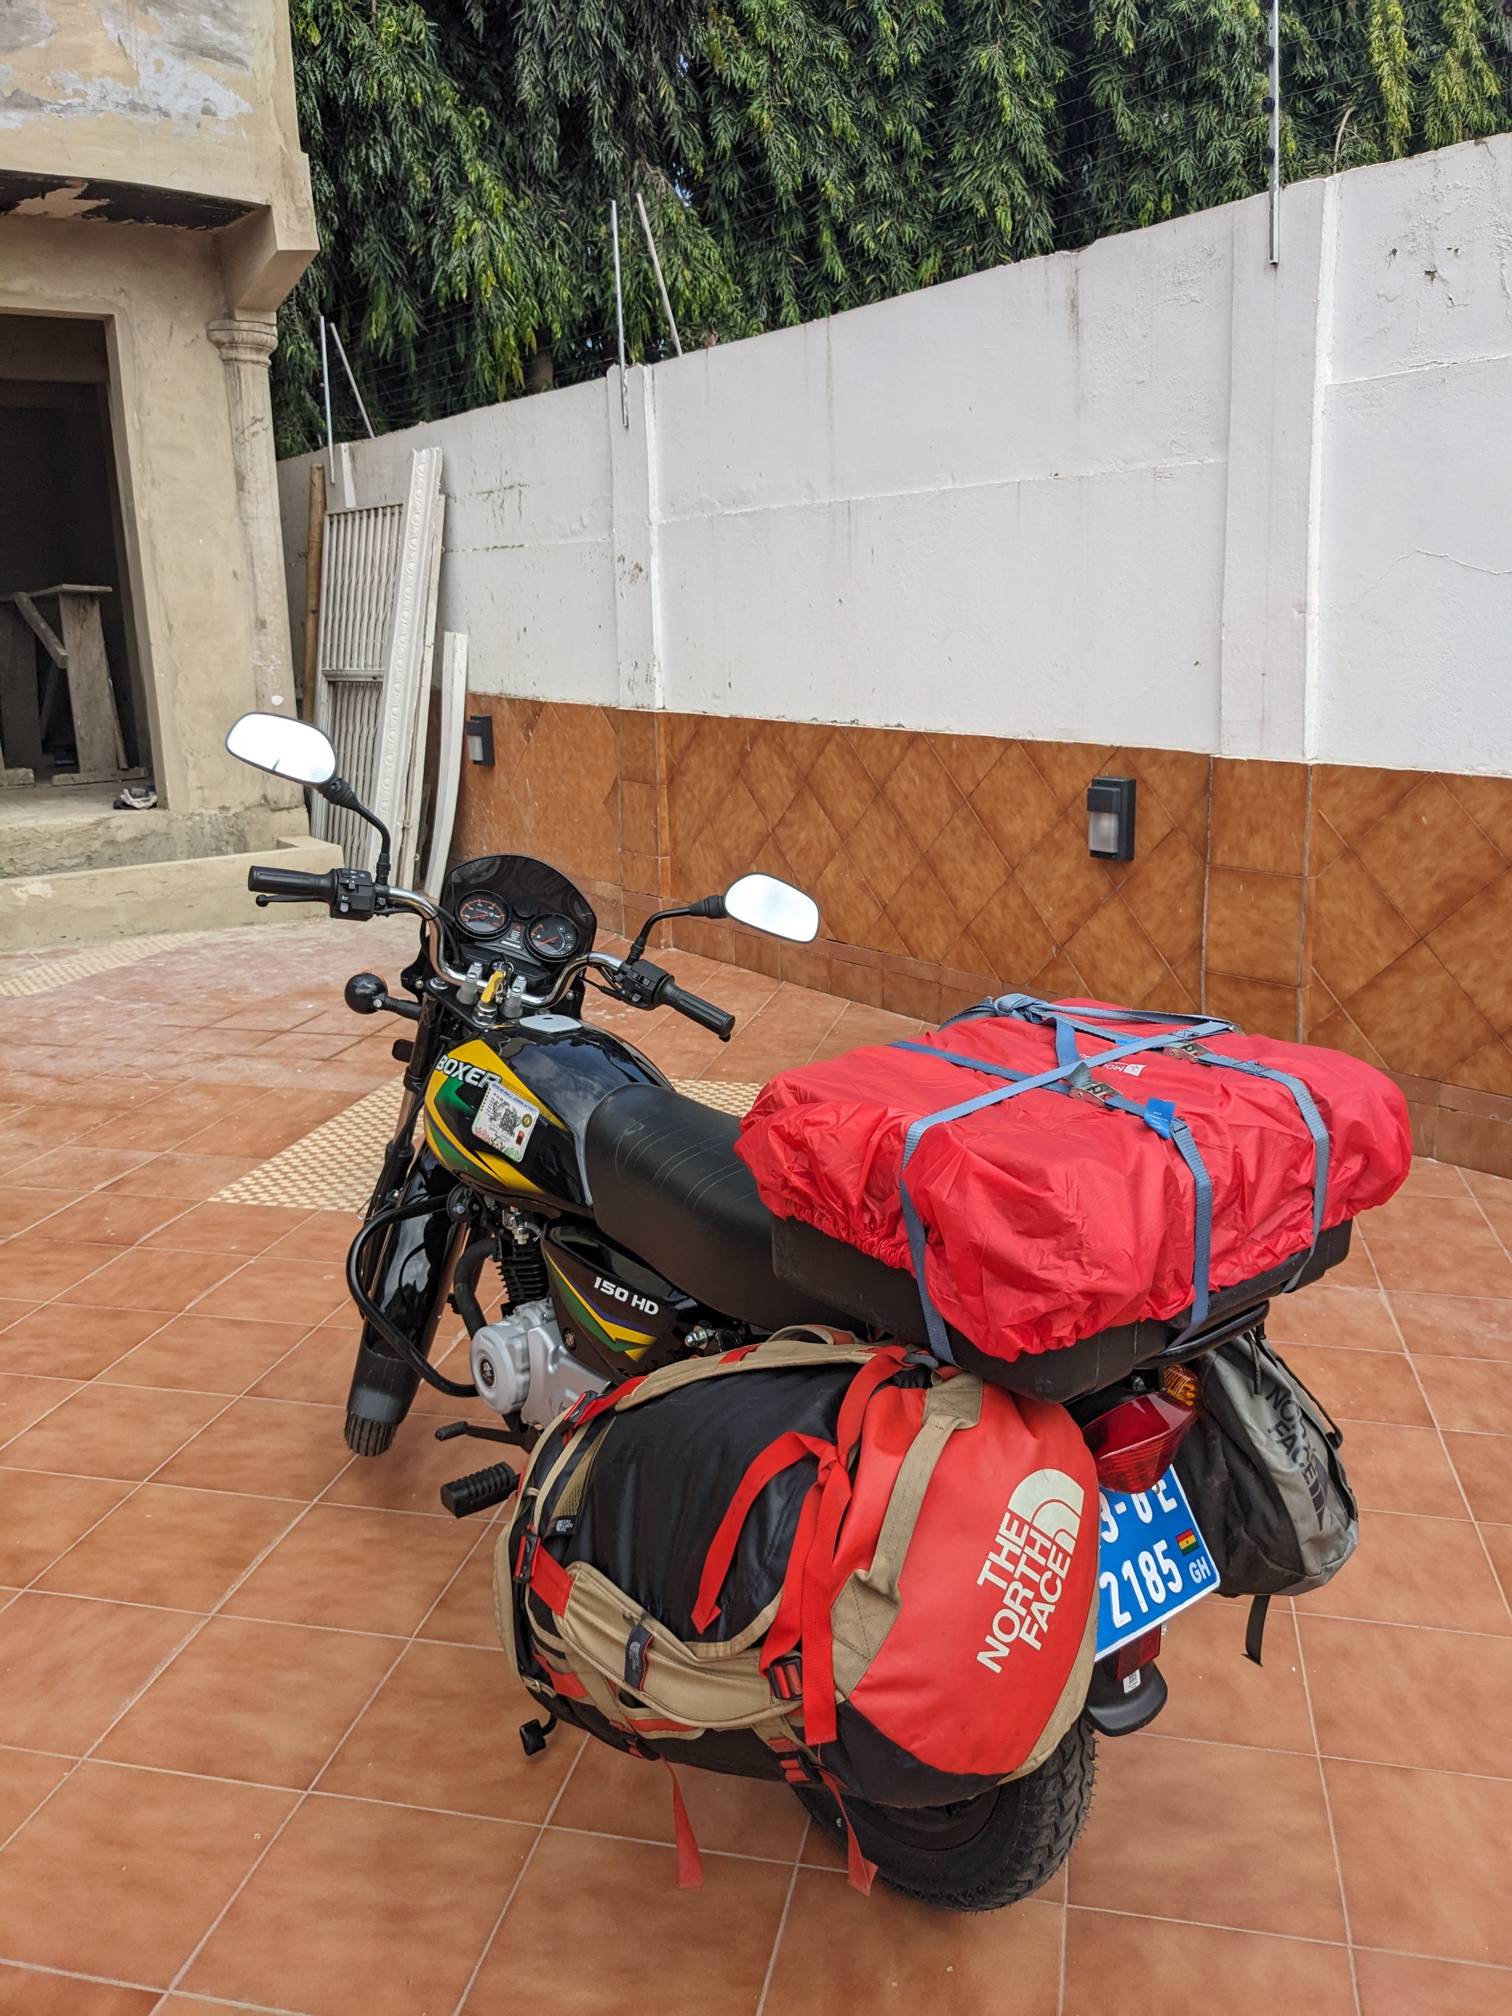
See the travel case I used on the left, pictured with the red cover on the bike on the right. I packed the synth, controller,speaker, sign, tip box, recorder, and cables into here and only kept music stuff in it. It’s quite durable and it locks with master locks so it was safe from the elements but easy to get at and open on a moment’s notice. One key to this or any type of street performance is using a system that doesn’t break down and which has parts that can be replaced. At about week 3, the cable I used to connect from the controller broke, but I did have. backup that worked but was much longer and required cable management. I found one of those in Monrovia eventually but luckily I was prepared with a spare. It turned out that it didn’t make any sense to put out a tip box in almost anywhere I went, so I quickly abandoned that idea, especially after someone tried to steal my tips in Accra.

Waldorf Blofeld

The new white Blofeld (which I bought as a backup to the black one that went to South America) performed like a champ and looked great doing it. When I got home I ordered more adapters for the controller so I can go back to wireless operation. It’s funny though, when I just lay the synth down nearby and just play the controller, my tips aren’t as good as when I wear the synth, so I’ll probably continue to do that regularly.

Moto Adventure

The moto adventure itself was crazy, from paying bribes to having guns pulled on us, from driving rain and mud to barely

Bajaj Boxer 15

passable roads and corrupt officials, this trip had everything. But having this aspect of playing live in the streets really ups the ante and sharing electronic music with people around the world is all I really want to do. Super happy to have been able to complete the very physical moto driving part without any injuries to me or my companion as well. If by some miracle I can afford it in the next few years, the next one will be touring Australia!

Stats

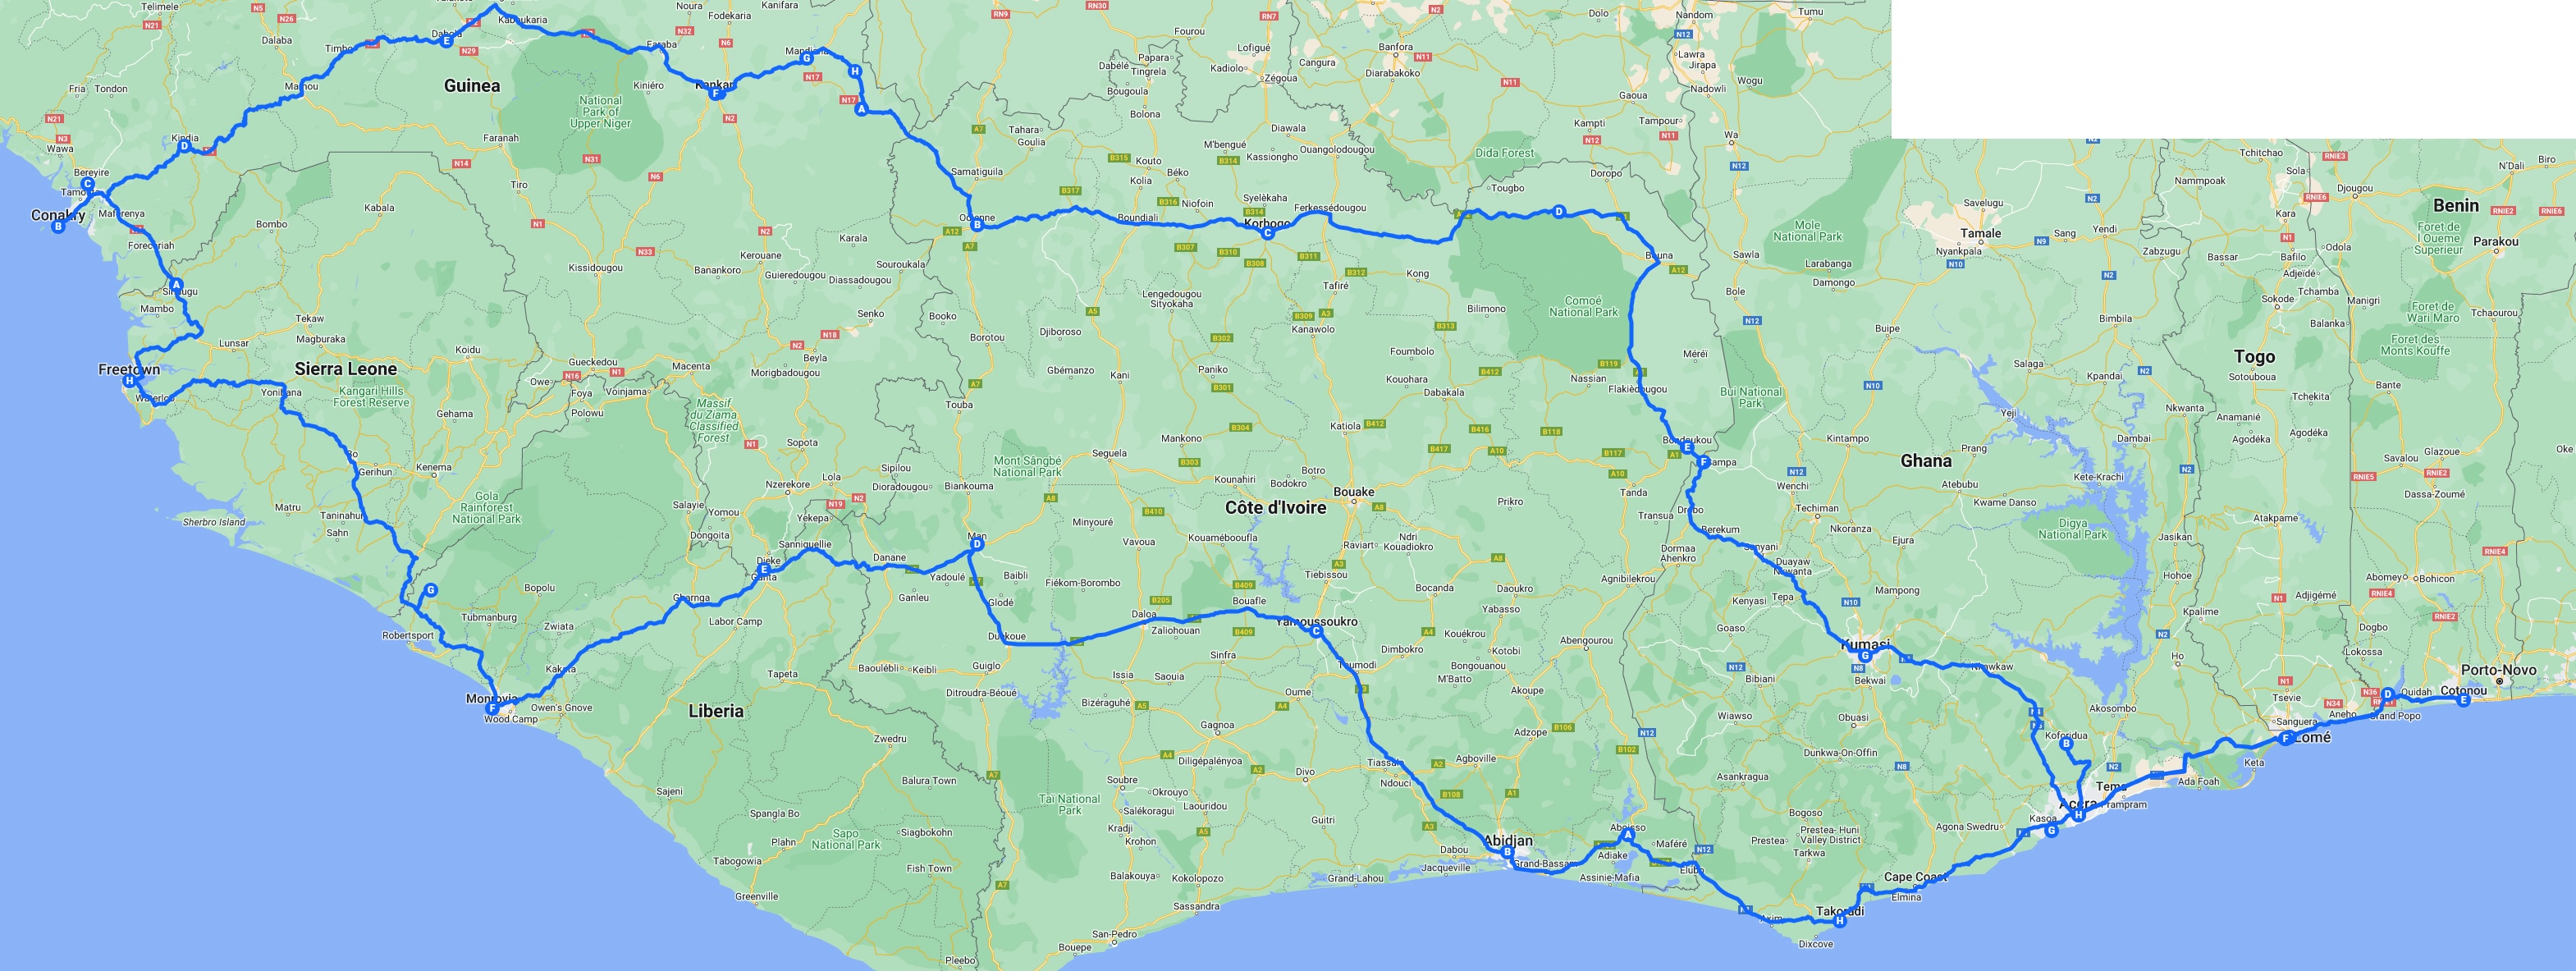
Countries: Ghana, Togo, Benin, Cote d’Ivoire, Sierra Leone, Liberia, Guinea

Distance: 7000km

Motorbike: 2023 Bajaj Boxer 150HD

Time: 6 weeks

the full journey


TB-3 Editor 2.21 with Pattern Save/Recall

Here is the latest version of the TB-3 software, and now thanks to fellow user Trevor, you can save and recall patterns. Technically this was already possible, but this method allows you to name them and instantly recall them more conveniently and quickly, and of course integrates into the other features of the editor. I’ve also added some small improvements throughout the panel for things like double-click actions.

Download the latest versions below.

DOWNLOAD THE LATEST VERSION

MAC

PC


TB-3 Editor 2.21 (ZIP FILE)

TB-3 Editor 2.21 (BPANELZ FILE)

going wireless

The Dream Becomes Reality

the wireless rig with black qunexus

the wireless rig with black qunexus

The outdoor synth rig has gotten a welcome update — bluetooth wireless. Before, I was tied by USB cable to the synth and the synth was tied by audio cable to the speaker, so every movement had to be carefully considered so as not to disturb the synth or cables. And it’s been a dream since I started this in 2017 to be able to do this wirelessly, but the technology just wasn’t ready yet because normally, bluetooth has too much latency to be usable for midi. But a new product came out around 2019 that solves one of the big problems, allowing latencies as low as 3ms. But the invention of these low-latency devices didn’t fix everything for me. There were still more hurdles to overcome before I could enjoy the benefits of wireless in my outdoor rig.

Low-Latency Wireless MIDI Invented

WIDI Masters

First, the wireless product is called WIDI Master and it allows you to replace a wired midi cable with two bluetooth adapters. These automatically connect to each other without user input and don’t require a battery or external power source because they are powered by the MIDI input itself. I got the WIDI Masters early on in their development from Hong Kong and tried them at the time and found them to work well. But using them would only eliminate a short MIDI cable, and I would still be attached to both the synth and the speaker, so I could technically be “wireless” but it wouldn’t actually free me from the synth. I would occasionally use them to connect gear in the studio, but otherwise the WIDI Masters lay essentially unused for at least a couple of years.

Red QuNexus and the New Adapter

the wired rig with red qunexus

the wired rig with red qunexus

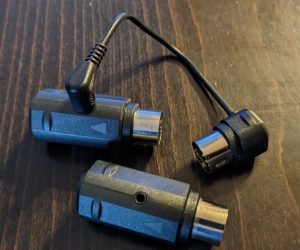
But that all changed when I bought the updated version of the QuNexus controller in fall of 2022. Even though they are tough and can even endure a bit of moisture and shock, these controllers usually only last about a year because they are not really built for the hardcore kind of outdoor and travel usage I put them through. At this time I was down to my last working unit, and I always need a backup in case my main one goes down, so I made the plunge. I had noticed most shops were selling the new “red” QuNexus that makes a few hardware and software updates and was introduced to replace the “black” model, so that’s the one I got. There are pros & cons about this new version which may get a blog post of their own, but the main pro is that this one came with an adapter cable that goes from mini-USB directly to 5-pin MIDI. You can see it in the lower right corner of the image of top image on the page. At the end of it is the blue light of the WIDI Master, and there are no longer any wires from controller to synth. But the job wasn’t quite done yet.

One More Door To Open

qunexus with battery and usb micro connection

When the USB cable was connected to the expander box, it also provided power for the controller through the mini USB port. But now the power to the controller had to be provided separately since I had eliminated its power cable and replaced it with a wireless bluetooth device. So I attached a battery pack with hook and loop and connected a micro USB cable to the other controller input for power. And with this, the rig truly became wireless, at least from a controller standpoint. The controller is powered from one side and sends MIDI data out the other side. The expander unit then receives the midi input and transfers it to the synth, without noticeable latency. This wirelessness comes with lots of benefits and almost no drawbacks. Allow me to go into a bit more detail.

What It All Means

Warschauerstrasse perform, Berlin

Now that I don’t have to be connected directly to the synthesizer, it means I can put the synth and speaker down somewhere, and then walk around and interact with the crowd anywhere in range. This upgrade even lets me lay down a few dance moves during the performance. And most importantly, it eliminates most of the performance-interrupting issues that I often encounter when wearing the synth, like: 1) turning the synth off 2) unplugging a USB cable 3) unplugging an audio cable 4) turning down/off the volume and 5) switching patches. Getting rid of all these problems leads to more interactive and expressive performances that really engage an audience, and with less interruptions. I still always keep the wired version with me though because you never know when you might need a backup. 😉

If you want to see the latest setup in action in Stockholm, go to YouTube and check it out.

TB-3 Editor (v2.19) with Patch Librarian

DOWNLOAD THE LATEST VERSION

After many late nights and early mornings I finally got the patch save and recall functions added to the TB-3 editor panel. Now you can save your sound creations to the computer and create a library of sounds that you can share with others. And whenever you’re ready, you can reload the patch into the TB-3 and it will be exactly as you left it. Since you can save them to your computer, it means you don’t have to use the 16 user presets to store your creations, you can just load them into machine whenever you’re ready. It also means that you can load patches into the TB-3 without touching the front panel or sending program change.

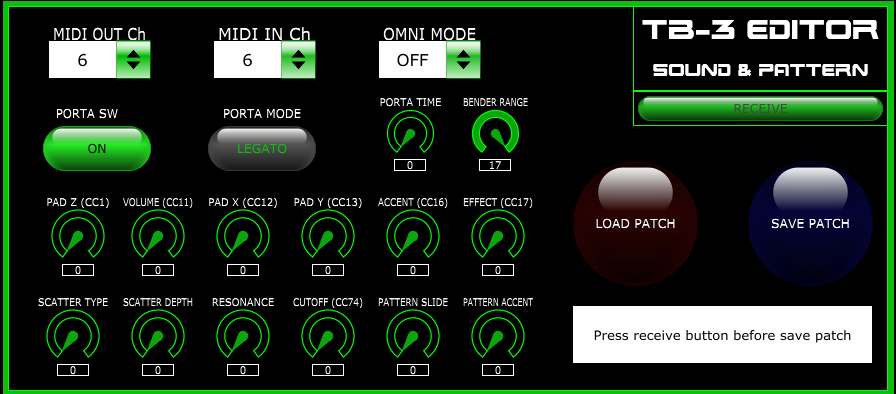
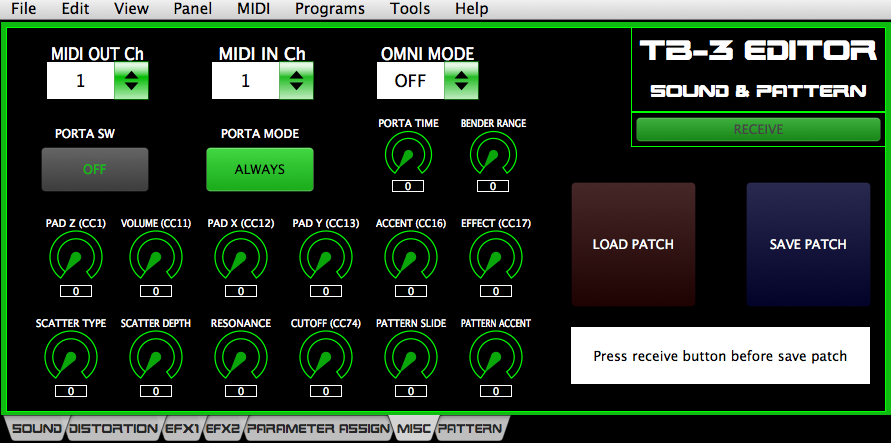
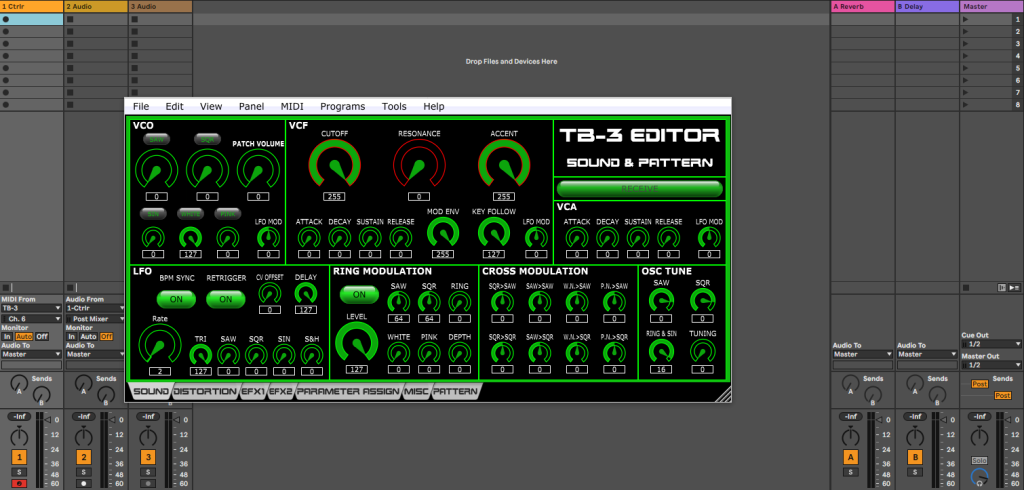
In this version, supported midi CC’s are also included in the MISC tab, like scatter type/depth, the mod sources, volume, and more. This version also fixes a few minor bugs and improves the layout logically and visually. I also was able to successfully pull up the panel as a VST in Ableton, so you can also integrate it into your DAW. Here are some screenshots from the pages that have been changed:

misc tab

The MISC tab contains the control change parameters, patch save & load methods, and various other settings.

also works on Mac

CTRLR is cross-platform, so it will work on your Mac too.

Also functions as a plugin in Ableton or other DAWs.

main sound editing tab

The sound tab has been reorganized into more logical sections.

This is the culmination of many years of study, work, and testing on both the software and hardware sides, and I’m really happy that it now allows users to save an unlimited archive of sounds to their computer, which can then in turn be shared with other users. I had already been using my own version of patch save and load, but this is actually even easier for me to use because I can save incremental patches as I’m programming with just the click of a button, whereas before, I had a process to save it to my sequencer which was much more time consuming. I’m also excited because this should open up this synth to the world so that everyone else can see what it is about this machine that I think is so great. Hope you enjoy it!

A few quick notes about how the machine and the software works. First, when you are scrolling through presets or user patches and push receive, the cutoff, resonance, and accent will default to the values set on the front panel. When you save or load a patch though, they will be saved and updated correctly. So always make sure you set these three values when you’re ready to save a patch. Second, as is noted on the page, always press the receive button before initiating a save or load procedure to ensure your panel reflects all the latest values. At this time, check your cutoff, resonance, and accent values as above to make sure they are like you want. That’s why I’ve outlined them in red, so you know that they act a bit differently than the rest of the parameters. I also discovered that the RING parameter in the OSC TUNE section controls the tuning of the sine wave as well as the ring modulator and that the level needs to be high to get the ring modulator really “cooking”, so if you want to use the SIN wave as a sub bass oscillator, don’t crank up the ring modulator tuning as their settings are dependent on each other, for whatever reason.

And for those who are really detail-oriented, here are the new features, improvements, and bug fixes in this version (2.19):

      • patch save / load via sysex files
      • added CC parameters 1, 11, 12, 13, 16, 17, 68, 69, 71, 74, 102, 103, & 104
      • the “CV offset” section was renamed “OSC TUNE”
      • moved patch volume to VCO section, moved LFO CV offset to LFO section, and moved “Tuning” CC parameter to OSC TUNE section
      • small design color tweaks for cutoff, resonance, accent, & patch volume
      • saw and sqr CV offset and patch volume were being misassigned during parameter assignment (fixed VST IDs)
      • changed colors for “polarity” button in ring mod FX1 & FX2
      • added info to Ring Mod in OSC TUNE section to indicate it also controls the tuning of the SINE oscillator
      • lots of layout improvements

DOWNLOAD BUNDLE MAC/WIN (.zip)

DOWNLOAD PANEL ONLY (.bpanelz)


Cirklon in the corner

After three and a half years of being on a waiting list, I got my Cirklon Feb 2 last year. This sequencer has a reputation as perhaps the best sequencer available, but is almost pure unobtanium due to recurrent production halts at Sequentix. And the last I checked, the waiting list remains more than two years long and the price still sky-high ($2265 with wooden end cheeks and no CVIO for me),  and yet, I can’t use it. For me, there are many reasons why I can’t yet integrate it into my current workflow.

Legacy MPC at the Center

I use an MPC for sequencing, first with a 2000XL and since 2016 or so a 2500 with JJOS. I have an all-hardware setup and I produce for the studio in the same way I play live, with hardware synths and samplers and an RME audio interface with Totalmix to manage mixes. The synths are more or less hard-wired, that way, any track can be performed in the same way and on the same hardware as they were written, whether today or three years ago, and I hope to make the Cirklon serve in the same role. But it’s just been too much for me, and now I just pull it out every once in a while to try something out or if I have a particular project that seems suited to it, but isn’t part of my normal workflow. Why? For me and my particular situation, here are a few reasons why.

Different Style

The Cirklon is a different approach to sequencing than the MPC.  This machine is incredibly complex in its ability to generate random and semi-random events, which I am keen to try out. But it is like what Ableton is to Logic — it’s a paradigm shift. I quickly compose on the MPC now, and I don’t want to take time to learn the details of making the Cirklon operate like my old setup does so it can adapt to my old material. This is obviously just a personal preference, nothing to do with the machine itself.

Legacy Material

Speaking of older material, it’s complicated to pull off on the MPC, but I know how to turn individual songs into long sets. I can make hours-long live sets and keep the composition and mixing of individual songs separate from each other, but the Cirklon doesn’t work like that, at least not that I’m aware of.

Different Song Modes

On the Cirklon, I can immediately see the benefit of say, reusing kick drum midi sequences that are the same for many tracks, but use different sounds. But rearranging all my current MIDI tracks to do this is a formidable task because they are almost never on the same track number. I suppose I could just play the parts into the Cirklon and record, but the “song” mode on the Cirklon would be where I would set up the arrangement of a track on the MPC, and there is no higher level than that. Not quite sure how it would work on the Cirklon. At any rate, that would mean I would still compose on the MPC, then play the parts into the Cirklon when it’s time for a live set and I don’t really want another layer of work to do before shows.

Software Development

The OS development is crazy for the Cirklon — if you find a bug and bring it to Colin’s attention, he will immediately address the bug. Great! However, many times when he fixes a bug, it seems to introduce other bugs, like with the SMF import bug he sort-of fixed for me. He actually made two fixes to this for me, but neither time fixed it completely, so I gave up and didn’t want to take up any more of his time. I fear his testing procedure is a bit haphazard, or the code is spaghetti, or some combination of both, because this happens fairly regularly, not just with me. Because the SMF import bug was never quite fixed, I still haven’t been able to easily import my old MPC sequences into the Cirklon without modification.

Crashes

Another thing about the software is that when I first got the machine, I was surprisingly able to induce crashes a few times, which I can only recall happening with the MPC maybe twice ever, and both times, the sequences continued playing even though the screen was sporting garbled characters. I will say that since then I haven’t seen the crashes, but then again, I haven’t used it as much either. The stability of a sequencer is absolutely at the top of my list as I perform live exclusively, and things just have to work every time. You can’t risk playing a show and having someone there who could potentially help your career but it is ruined when the sequencer barfs. I suppose in a live situation I would act differently and not try things I don’t know, but still, it put a scare into me.

No Sysex/NRPN, Probably Ever

Finally, I use sysex in my live and studio setups to load the patch into my TB-3, and the MPC handles it, but in almost ten years of requests and development on the OS, NRPN and system exclusive have still not appeared on the Cirklon’s feature list. And I had read at one point that the space for the OS was nearing 90% full, and a feature as complex as this is doubtful to ever make it in. So if you need either of these features, this probably isn’t the right machine for you unless you can find workarounds.

Workarounds

Most of the things I mentioned in this blog are things that are just a difference in workflow, and in reality, most things can be worked around some way or other. The TB-3 does have 16 user slots and I could load the set’s patch sounds manually, but anything that isn’t automated in a live set can be forgotten when the excitement of the actual gig is happening. Or the “long” song mode I use where long separate tracks are strung together into sets, but the composing part wouldn’t be intuitive for quite a while using Cirklon, if it’s even possible. But that’s the thing about workarounds, they take time, and sometimes lots of it, and right now, I need to compose, not experiment for days while my projects don’t get done.

Soon, I Hope

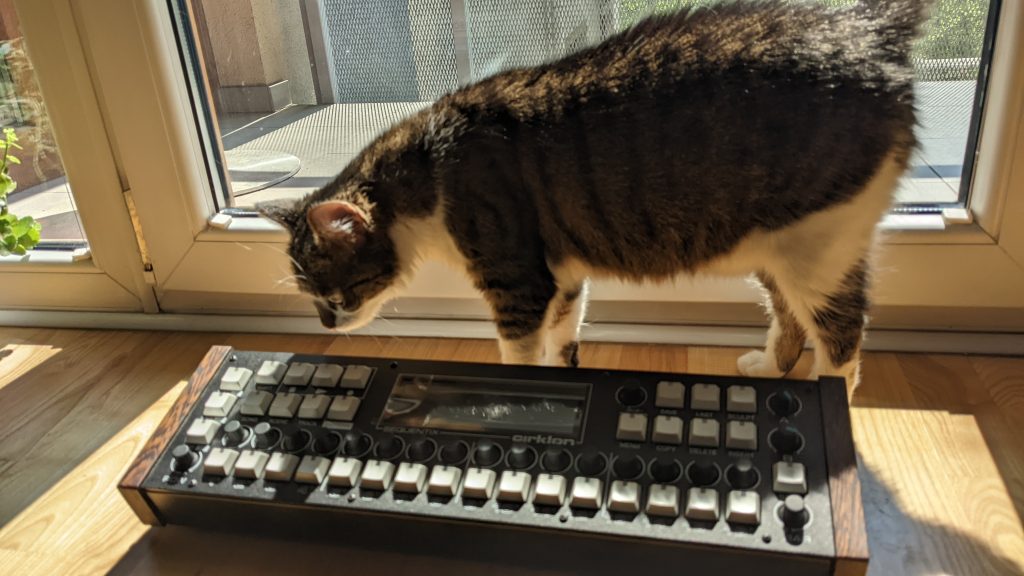
I really want to integrate this machine into my setup and retire the MPC for a number of reasons. First, it’s smaller to move around than the MPC. Second, it’s got 5 midi inputs and outputs, which is perfect for my live setup. Third, its timing is supposedly even better than the famous MPC’s. And many other reasons. But that will have to wait until another day. Today, the Cirklon sits in the corner where my cat and I occasionally sniff it.


Factory Reset & TB-3 Startup Modes

My machine locked up numerous times in my testing process, so that whenever I scrolled past the bad user preset, it hung and the TB-3 had to be restarted. This was fixable though by writing a known good patch over the bad one. However at some point the machine wouldn’t even power on and none of the startup modes worked. Uh-oh. What did work was holding [STEP REC + REALTIME REC] while starting and this boots you to a developer/debug mode, where choosing option 6 initiates a factory reset. But there’s a much easier way if your machine still boots and if you don’t mind returning all user patches, settings, and patterns to factory default:

          • hold [REALTIME REC] + restart
          • display reads “rSt” and PLAY/STOP button is flashing
          • press the PLAY/STOP button to confirm or restart to cancel

Pretty easy and straightforward. If your machine won’t access this mode, you can also activate this function with the developer mode catalogued below. There’s a lot more hidden in the startup modes, and here’s all the information I could find about them. (The Global mode information can also be found in the front panel guide.)

ALL KNOWN TB-3 STARTUP MODES

(all modes accessed by [holding] a button or buttons and restarting)

    1. GLOBAL SETTINGS: [SCATTER]
      • set these global parameters:
        1. MIDI channel
        2. MIDI clock source
        3. MIDI OUT is also MIDI THRU
        4. PAD Z sensitivity
        5. Master Tune
        6. LED demo
    2. BACKUP/RESTORE PATTERNS: [PLAY/STOP]
      • here you can backup and restore all the patterns from your device. copy the files only, not the folder. refer to the firmware update document
    3. FIRMWARE DISPLAY: [TEMPO]
      • the firmware version is displayed until you press START/STOP
    4. FACTORY RESET: [REALTIME REC]
      • press flashing PLAY/STOP to confirm or restart to cancel
    5. FIRMWARE UPDATE: [KEYBOARD + PTN SELECT]
    6. DEVELOPER / DEBUG: [STEP REC + REALTIME REC]
      • once the machine starts, the display reads N-1, and there are 6 options to choose from using the value knob:
        1. N-1: Display the current firmware version.
        2. N-2: USB test mode. Display reads “USB”
        3. N-3: LED test mode. All lights on at their brightest.
        4. N-4: Touchpad calibration, followed by a test with a loud sound even if you turn down the volume, followed by a factory reset. Left side green touch pads are lit, three dashes in display
        5. N-5: Display reads “OUT”
        6. N-6: Factory reset. Same as holding REALTIME REC and restarting.

If you find any more startup modes, let me know.

Version 2 of TB-3 CTRLR panel

DOWNLOAD THE LATEST VERSION

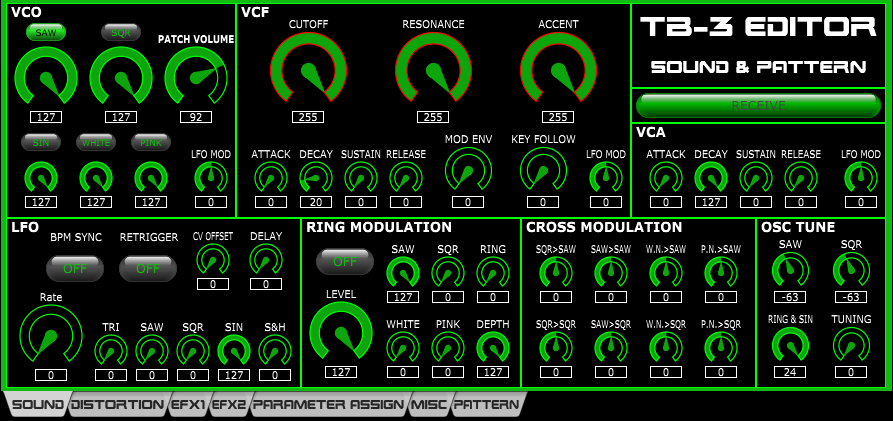
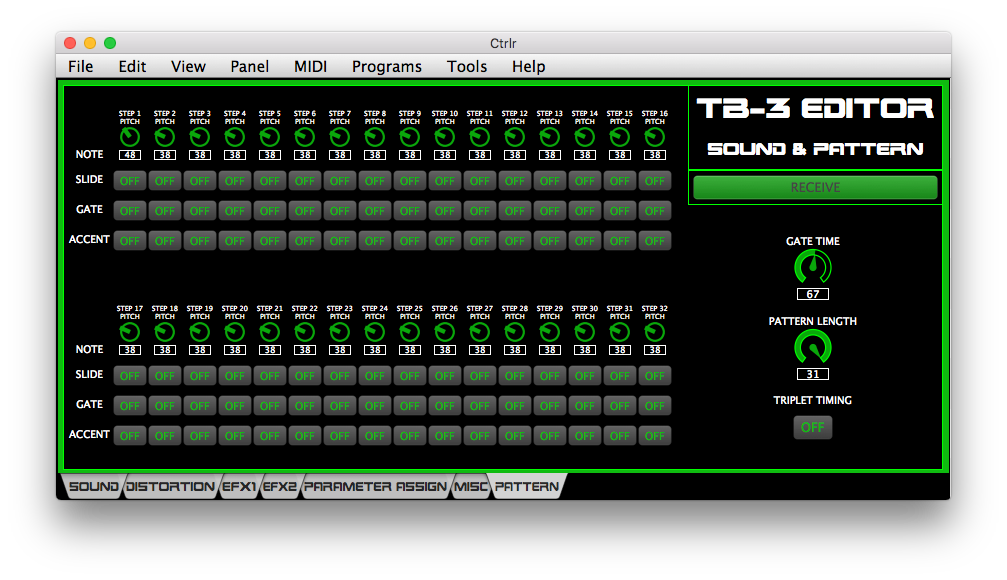
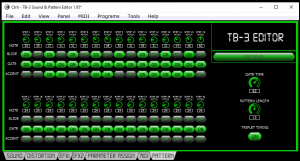
I’ve released a new version of the CTRLR editor that I have been working on for quite a while now. Of course, all the elements from the last version which added the real-time pattern editor are also included, such as gate time, triplet timing, pattern length, and access to all 32 steps of the pattern, but this one is a significant improvement in every way and I highly recommend you upgrade to this version.

The TB-3 pattern editor, introduced in version 1.95

In this version, everything has been thoroughly tested and verified to work, all the bugs I could find have been fixed, and many new parameters have been exposed to the interface. Even the VST integration should work, although I haven’t tested any of that. So let’s start off with the bugs that were fixed in this version.

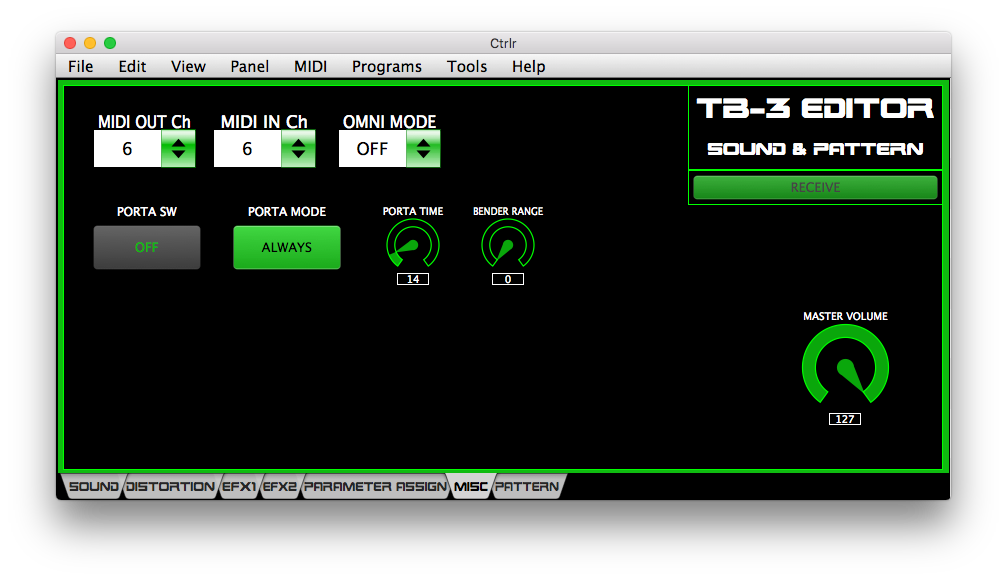
portamento, bender range, master volume, & midi channels

BUG FIXES

    1. delay 1 wet/dry levels crossed-up when read from synth
    2. reverb spring sensitivity & wet/dy levels crossed-up when read from synth
    3. pitch shift direct level change caused high mid gain EQ to change
    4. fixed/edited parameter table/VST ids
    5. fixed crossed-up CV offset square and sawtooth values
    6. increased ringmod range (fx1 & 2) to 127 for frequency, sensitivity, and level
    7. fixed parameter assign routine and updated parameter ID table to include all possible parameters that can be assigned
    8. CV offset section reflects actual pitch range (-127 to 24) and values are pulled in properly. 0 is 440Hz.
    9. CV offset LFO range changed to 0-127 (was -64 to +64)
    10. fixed LFO retrigger and LFO delay which weren’t updating panel

NEW PARAMETERS

Also in this version, a number of parameters that were previously absent from the panel but appear in the system exclusive documentation have been added. These are parameters that existed (like pattern editing) but were not coded into any previous version of the panel. Distortion color, master volume, and ring mod cross mod are even assignable as modulation destinations. Here are the seven new parameters that have been added:

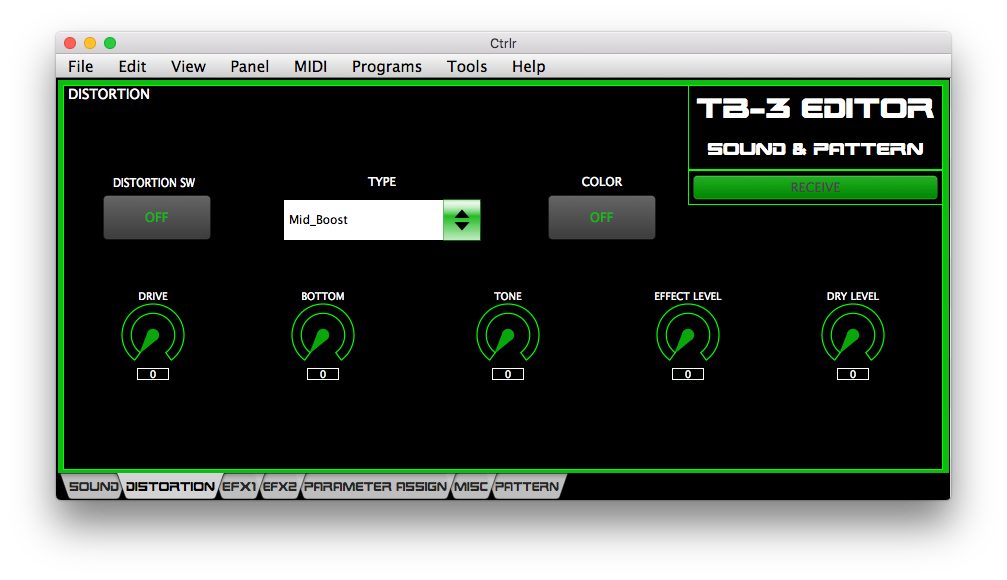
    1. distortion color (distortion tab)
    2. portamento switch (misc tab)
    3. portamento mode (misc tab)
    4. portamento time (misc tab)
    5. bender range (misc tab)
    6. master volume (misc tab)
    7. ring mod cross level (sound tab)

The layout and user interface has been improved in numerous areas

OTHER IMPROVEMENTS/ADDITIONS

I’ve also made a number of cosmetic and other improvements so that the panel is more intuitive, responsive, and accurate:

    1. added “Roland” font and included it in panel resources
    2. restructured layout to make more sense, especially in sound tab
    3. added/changed double click values for all parameters
    4. made sure all elements are equal size, equal distance, etc.
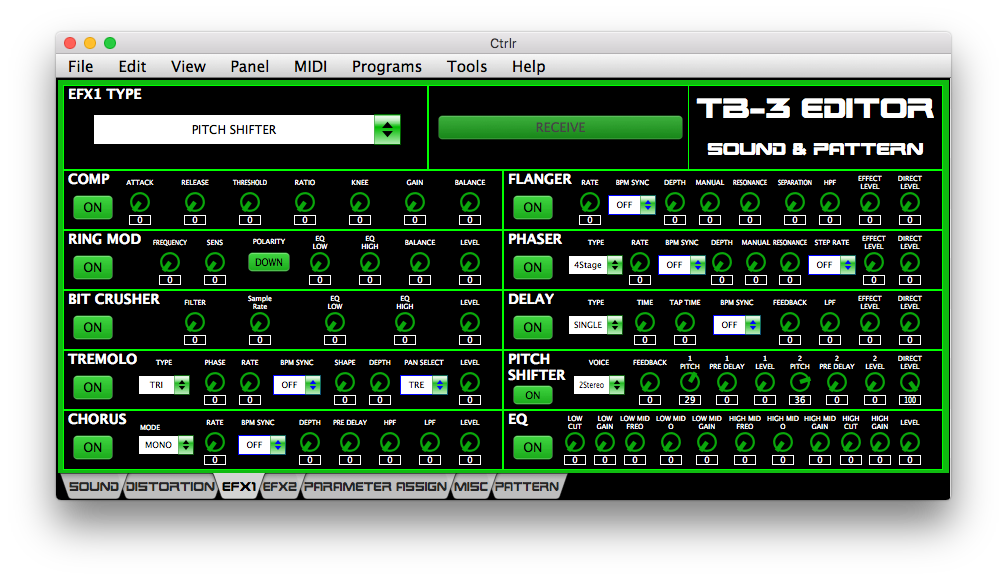
    5. cleaned up phaser bpm sync zone (fx1 & 2) for the dropdown so the arrow and not just the box can be clicked
    6. cleaned up and documented a lot of code

END OF THE LINE

This should be the last version of this panel unless I find a bug, because as far as the documentation is concerned, there are no more parameters that exist that aren’t included in this version. The only issue I’ve found that I can’t fix is that the front panel knobs cutoff, resonance, and accent seem to override any values returned from the the synth when scrolling through presets. However, patch backup and restore saves and restores them properly as long as you change the values in the interface. If I do find the solution to this, I will issue one last version, but for the foreseeable future, this is the version I use, and now I offer it to everyone. Enjoy your expanded TB-3!

DOWNLOAD THE LATEST VERSION

Roland TB-3 Front Panel Guide

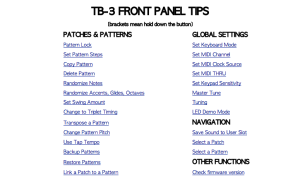
I’ve finished pulling together every bit of information on the TB-3’s mostly undocumented front panel button combinations and placed it into a web page and a PDF document. The information gathered here was formerly scattered all over and whenever I wanted to find out how to do something, I had to reference multiple documents and web pages, so I made this document that would save me time. The other info I’ve found on the web also has things illogically organized, so I’ve also grouped everything into what I think are the most logical sections, which are “Pattern Select” mode (tap the PTN SELECT button), “Keyboard” mode (tap the KEYBOARD button), and the global settings, which have different mechanisms outlined in the document. Some of these were added in the latest firmware update (1.10), so you may have to update your firmware to be able to use everything here. So now, I share it with you and hope it saves you a little time and maybe you’ll see why I like this machine as more than just a TB-303 emulator…it’s a full-fledged sonic powerhouse.

Front Panel Guide (html)

Front Panel Guide (pdf)

TB-3 pattern editor

A new tab for Pattern Editing the TB-3

DOWNLOAD THE LATEST VERSION

I’ve been wanting to do this for quite some time and finally made a little time to do it…a software interface for the TB-3 pattern section. Most people who program this machine extensively probably are already aware of the CTRLR panel that exists to edit most of the features of the synth. However, there are some features missing, primarily, a way to program the patterns through software. The information has been out there for a while and I thought someone would have done it by now, but I guess sysex programming is pretty intimidating for most people. So here is a link to my updated panel, with resources embedded. I’m calling this version 1.95. When the entire interface works like I want, i’ll update to version 2.0. Hopefully haha.


uploading samples to Blofeld: Part 3

I’ve actually already made two posts about the Blofeld and sample upload, but it has been a few years since I needed to upload new samples, and I once again encountered problems, so I went through the process again. Previously, I had found success uploading samples with the PC version of Spectre, but when I tried to launch the program, it crashed before it opened. I uninstalled and reinstalled it with no luck. So I switched to the Mac to see if that would work. But before I get into the nuts and bolts of what actually worked, I should explain a couple things about sampling on the Blofeld.

Some Background

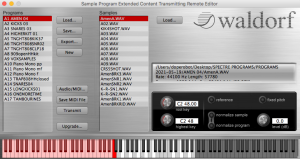
First, sample upload overwrites any samples that currently exist on the machine. So if you had uploaded some snare samples, and then later made a new program to upload hihat samples, those samples overwrite the snare samples. So if you want to build a library of samples without ruining the ones you already have, you have to append samples to the end of a single program. I add a new program onto the end so that previously uploaded samples aren’t overwritten. You also can’t delete any programs that you’ve put here because that will affect the sample number of any samples after it. (For example if you delete A12 program, the A13 program now becomes the A12 program, A14 becomes A13, and so on.) Here’s a screenshot of what my Spectre program looks like:

a screenshot of my spectre program

Second, the list of programs are only pointers to audio files, so if any of the files have moved from when you originally added them, they won’t appear. I tried to avoid issues by putting all samples into a specific folder, but it’s still hard to maintain. You can open up the xml file and see everything that Spectre has created as part of the program: low/high notes, normalize or not, location of the files, etc. But as you might have figured out, since I couldn’t get the PC version of Spectre to load, that meant that I had to find and move all samples to the Mac, and then update the xml file to point to the new locations. Eventually I updated all the links to their new locations and could begin the process of uploading the samples, but that turned out to be a whole other project.

Loading the Samples: Trial & Error

So once the samples were transferred to the Mac and the xml file was updated, I started trying to send the samples to the synth. (I’m just breezing past this part, but this took me two days of work to do.) I made sure the audio/midi settings were set properly, including setting both midi inputs and outputs. The only midi output on the desktop version I have is USB midi, although the keyboard version has DIN midi in and out. So first I tried with USB midi, but no luck. Then I tried DIN midi for the input and USB midi for the output, and that didn’t work either. So next I tried saving the file (Save Midi File) and sending that using Spectre and the “Upgrade” button, and that didn’t work either. Finally, I used the “save midi file” button and sent the midi file from Sysex Librarian, and even though it took hours to load, this worked. I know other people have gotten Spectre to send the samples, but I’ve never been successful on Mac. But saving the midi file and sending it over DIN midi worked every time. This also let me know that sending it via midi file doesn’t require a handshake procedure. The file I used originally was 29MB, and that took almost four hours to upload. I trimmed the programs of unused samples and brought it down to 20mb, which took about 2 hours to load.

conclusion

So to recap, what worked was:

    1. Save the midi file
    2. Exit Spectre and pull up a program like Sysex Librarian to send the file
    3. Set the output of Sysex Librarian to DIN midi
    4. Then press play and wait.

It seems this is the only reliable way to do it. It’s a long process but it ultimately works. Good luck out there!