Unofficial TB-3 Effects Parameter Guide
In search of a more complete TB-3 effects document
 I just love this little machine. Immediate, with a big sound, but on the surface, it’s a pretty simple device — a TB-303 clone. But once the full parameter implementation was revealed due to the reverse-engineering work of some enterprising sysex programmers, it became clear that this was in fact a monster sound design machine. 6 independent oscillators, VCF, VCA, LFO, ring modulator, distortion, and 4 modulation destinations amounts to a fully featured monosynth by just about any estimation. But that’s not all — it also has CV offset and cross modulation features that allow you to independently tune the oscillators as well as modulate all the VCO sources with each other. But then when you add in 21 separate mono and stereo effects, any two of which (except EQ and Pitch Shifter) can be used simultaneously, with hundreds of different parameters and options to control amongst them, it becomes hard to wrap your mind around what this machine might actually be capable of, even as a “simple” monosynth.
Enter Roland Documentation Hell
download the full guide here
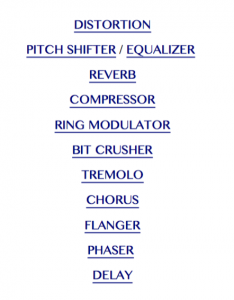
But even arriving at the point where I know what the parameters are, what they do, and what they mean, was no easy task, because this synth has been woefully unsupported by Roland in terms of documentation. Only a small few bits of information exist from the manufacturer itself; most of what has been learned about the features and operation of the TB-3 has been due to exhaustive sysex testing based on other Roland synths. And what they did provide was mostly just lists of parameters and values, without any descriptions of what they did, if it wasn’t immediately obvious. Sure, the chorus effect has 1 mono mode and 2 stereo modes, for example, but what are they, and what do they do? For that matter, which effects are stereo and which are mono, aside from the explicit stereo modes? As it turns out, the flanger and reverb are full-time stereo effects even though they are not indicated as such. What about if the BPM time isn’t synced, does time parameter become a percentage of the internal TEMPO value? (Spoiler alert: it doesn’t, effect times that are not BPM synced are independent of the system clock.) And so on.
A New Hope
But by testing and using the documentation of other similar Roland products, I constructed this TB-3 parameter effects guide which also includes the dedicated distortion section. Obviously there’s no guarantee that every single thing is spot-on in this document, and I wasn’t able to find information about all the distortion models, but it goes a long way towards gathering all the widely dispersed available information into a single source as well as including insight gained during testing if it seemed important or useful. So it’s not just dry information, but also tips that either clear up some unknowns or offer answers to questions that are not documented anywhere and could only be learned through the testing process. I even found one parameter that appears to be unimplemented even though it is documented and should be present (EQ level, in this case). Obviously, to even access these parameters you will need to: a) be able to understand and program midi sysex, b) use one of the software editors like mugenkidou’s and/or c) use one of the hardware presets like these ones I made for the Behringer BCR2000 downloadable at the end of that blog entry. This machine can easily be integrated into your DAW as well, and with this midi information you can, say, automate any of the hardware synth parameters in Ableton. And of course, I earlier researched and confirmed that you can save sysex dumps of all your patches for instant recall, so the puny 16 user patch locations need not be a limitation to your creativity. I never fail to get inspired by this little acid box, and I hope this helps you get excited about it too!
Unofficial TB-3 Effects Parameter Guide