House Beat
I want to use the Blofeld’s arpeggiators to create rhythm tracks that I can trigger manually, in essence replacing what a sequencer might be able to do. I thought my first try would be easy: a four bar beat with kicks on the quarter notes, claps and snares on the 2s & 4s, and a hihat on 8th or 16th notes. I thought, to do that, just set up the Clock value for each  arpeggiator to the note value you want. But it quickly became apparent that it’s not that easy–the kicks and hihats work fine since they play once every division, but to make the claps and snares land on the 2s & 4s, coding them to half notes doesn’t work, because they will play on the 1st & 3rd beat when the arp repeats its loop, even if you trigger it on the proper beat. So I need to either delay the start of the arpeggiator by one bar, or explore the user patterns, and as it turns out, the arpeggiator doesn’t have a delay, so it looks like I’ll be delving more into the user patterns.
Dubstep Beat
Before I do that, I thought I could at least program the kick without using a user pattern, so I set about creating a simple dubstep rhythm, 140bpm with the kicks on the 1s & 3s and the snares & claps on the 2s & 4s; a 4/4 beat in cut time. My first idea was to set the kick up as a pattern with a note only on step 1, pattern length of 8, and arp clock and length set to 1 bar. When the user pattern is set to off, this works great; once every bar, on step 1, the kick is triggered, no user pattern needed.
But to program a snare on the other beats it would be time to go into the user patterns, so I set up a 16 step user pattern with a single note firing on beat 9, or the “2” of the beat. The clock value is set to 1/16 and the length value is set to 1/2. I set up the clap to fire identically to the snares, and when I started them from the keyboard, at the beginning of a loop, they indeed trigger on the 2s & 4s. The nice thing about user patterns is that they keep triggering on whatever note you fire them, so a clap triggered at a different point in the bar other than the first note will keep triggering in that position, unlike the first experiment with a house beat, where the arp was realigned once it looped around.
kick step pattern #2
When I realized I had set up the kick pattern with an 8 step pattern and the others with a 16 step pattern, I went back and made the kick like the snares, except firing only on step 1, with clock value set to 1/16 and note length set to 1/2 notes. Works exactly the same, it’s just a different way to go about it, but maybe it won’t be quite as confusing later.
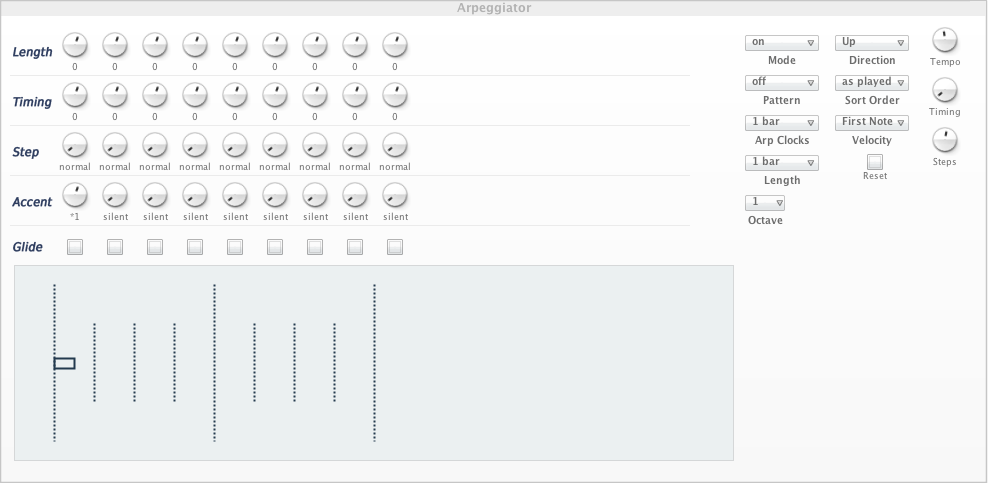
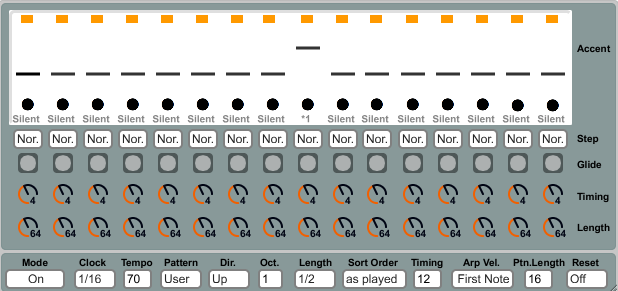
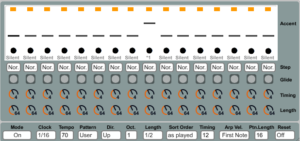
The arpeggiator has far more features than there is room to document in this short blog, but here are the parameters and some layman’s descriptions that turned out to be most important to me and that should help get you up and running in a jiffy.
- Clock Mode: Choose how to trigger the arp.
- Clock: The number of notes to play per bar.
- “1/4” is “4 on the floor” or one every quarter note, 1/8 will play 8 notes during the same time period, and so on.
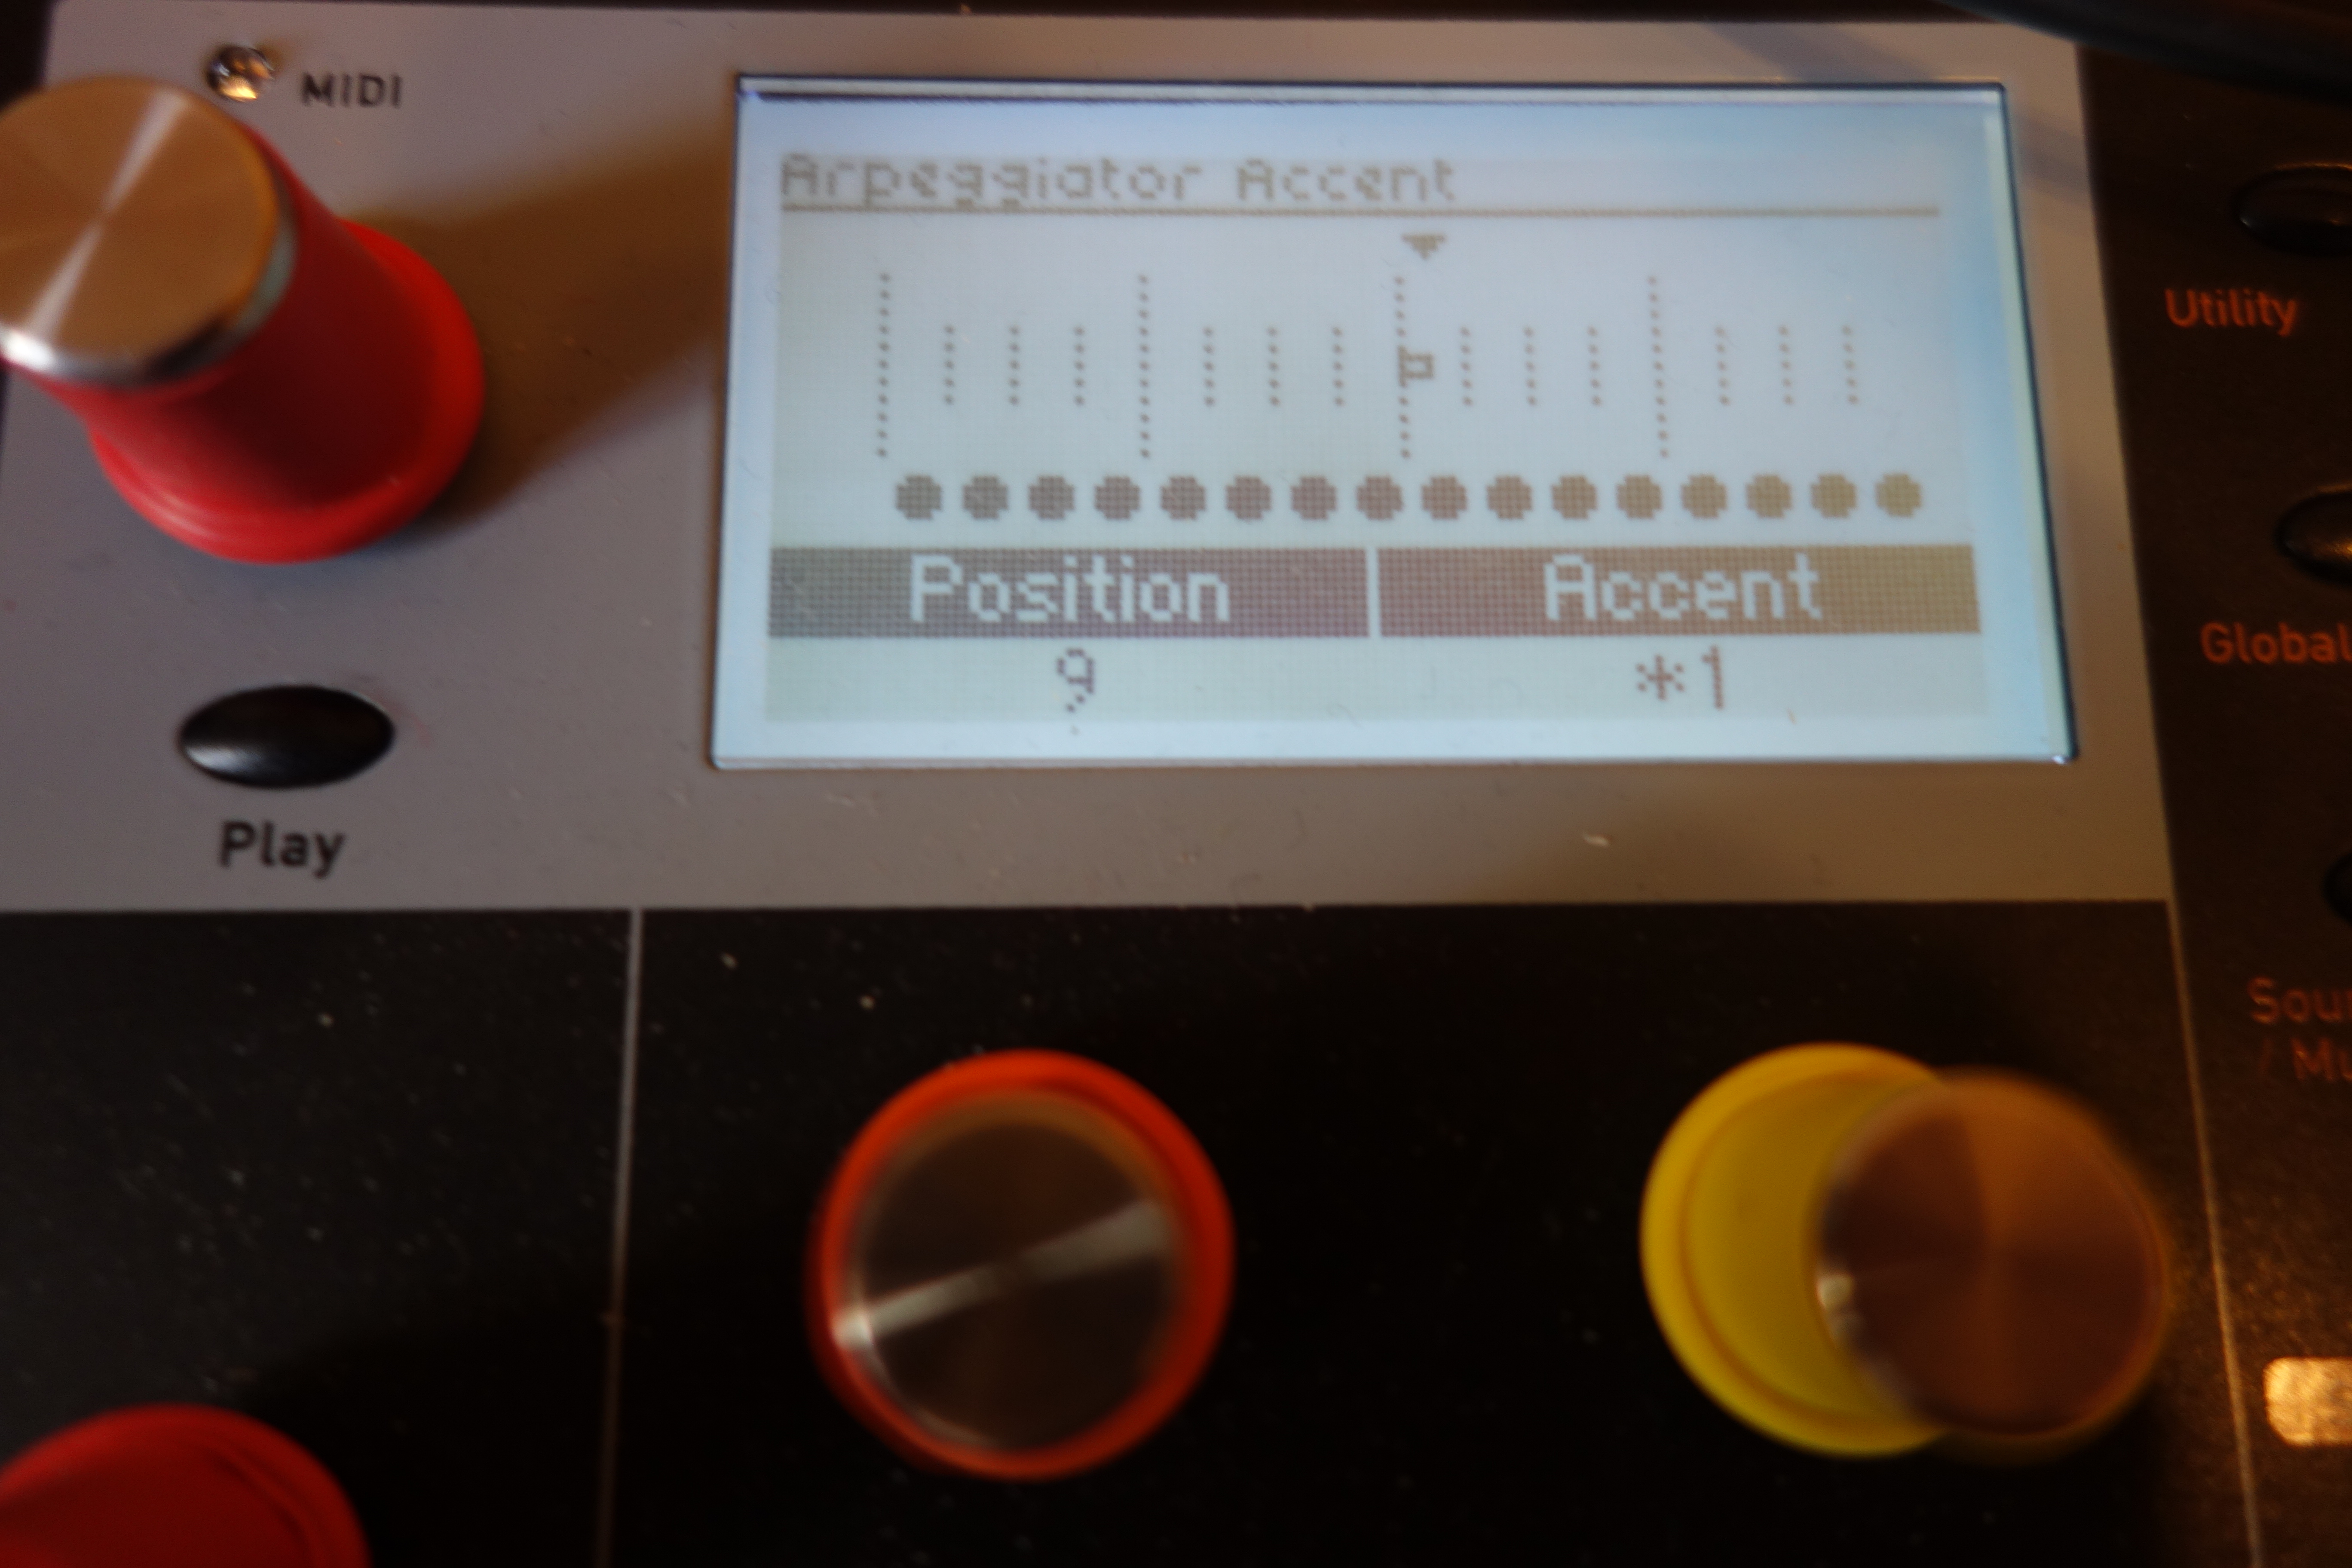
- Accent: Controls how loudly the note is played.
- To play a “rest,” this value has to be set to “silent.”
- Otherwise, *1 plays the note at its original velocity, while other values multiply or divide the provided value.
- Length: The length of the generated arpeggio notes.
- Negative values shorten notes and positive values lengthen them.
- Audible staccato effects will occur if the length value is shorter than the clock value, while if set to “legato” the length parameter is essentially ignored and notes of a step are held until the next step is played.
- Octave: After the initial pattern is played, repeat the pattern this many times, increasing or decreasing the octave each time before restarting the pattern.
- A value of “3” gives the pattern a “3 over 2” feel as the notes don’t line up every time.
- The “Direction” parameter determines the initial order of notes.
- Tempo: The speed of the arpeggiator.
- This value is overridden in the multi area.
Other values:
- Step: Normally an arpeggiator starts at the first step and plays until the last. All of these modes except normal allow you to alter this behavior.
- normal, pause, previous, first, last, first+last, chord, random
- Timing Factor: Add shuffle feel to any pattern or step.
- Glide: Add 303-type glide to any pattern or step.
- To use different glide amounts on individual notes in a pattern, Glide amount must be set to off in the oscillator edit menu.
- Otherwise Glide applies the same amount of glide for the whole pattern.